- Like
- Digg
- Tumblr
- VKontakte
- Buffer
- Love This
- Odnoklassniki
- Meneame
- Blogger
- Amazon
- Yahoo Mail
- Gmail
- AOL
- Newsvine
- HackerNews
- Evernote
- MySpace
- Mail.ru
- Viadeo
- Line
- Comments
- SMS
- Viber
- Telegram
- Subscribe
- Skype
- Facebook Messenger
- Kakao
- LiveJournal
- Yammer
- Edgar
- Fintel
- Mix
- Instapaper
- Copy Link
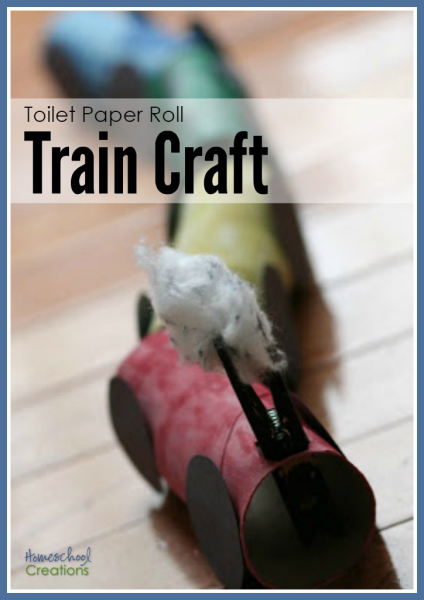
This last week our preschool time focused on the letter ‘T’ and that included making a little train as our craft. It was too cute to just post a picture of and not give directions to make your own. {grins} A friend’s son made something similar and so I tweaked it to make it work even better. This project would require more adult help for younger kids (i.e. 2-4) ~ depending on how much cutting and pasting they are able to do.
You can make your train as long {or as short} as you’d like. We decided on four colors, so we had four cars on our train. Be sure to ask your child which is first and last. I forgot that the caboose is red…and had a four-year-old that was non-too-happy when he saw I made it the engine.
Oops.
That said, here’s the scoop on making your own little engine and rail cars.

What You’ll Need:
- Four or more toilet paper rolls {you can get these extremely fast if you leave your two-year-old alone in the bathroom for about 4 minutes or so}
- a clothespin
- a cotton ball
- paper clips {colorful ones are even more fun}
- black construction paper
- a hole punch
- glue stick
- scissors
- various colors of paint
- a LARGE smock and painting tarp {i.e. protection for anyone surrounded by a paint-weilding preschooler}
How to make it:
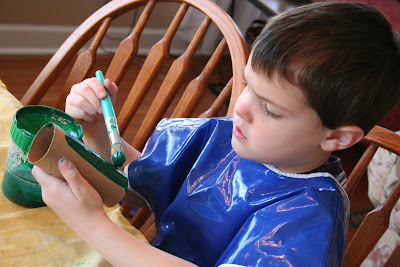
- Have your child paint each of the toilet paper tubes. Set them aside to dry.
- Paint the clothespin black. Set aside to dry.
- Trace 4 wheels for each toilet paper tube that you decide to add to your train. I traced around the end of a toilet paper tube. You can fit about 20 circles on a sheet of construction paper. Have your child cut some {or all}of them out.
- Use a black marker {or some black paint} to color your cotton ball to make it look like the smoke/steam coming out of the train.
- When the paint is dry on the tubes, lay them all on the table to find how they best ‘rest’. Glue 4 wheels onto each train car.
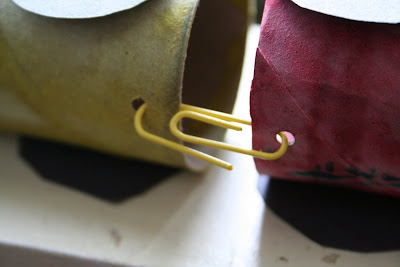
- Line up the cars in the order you want them to be linked. Punch a hole on the bottoms of each car {front and back except for the engine and caboose} to link each train car together.
- Link the train cars together using paperclips.
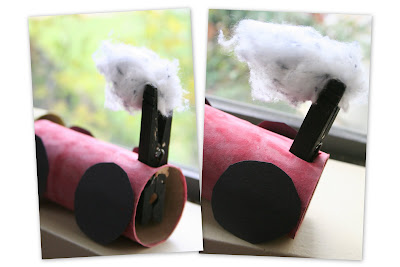
- Punch two holes (overlapping) on the front top of the engine.
- Insert the clothespin into the two holes on the top of the engine.
- Glue the cotton ball to the top of the clothespin and pull/stretch it out to make it look like the smoke is traveling behind the train.






 The printables shared on this site are FREE of charge unless otherwise noted, and you are welcome to download them for your personal and/or classroom use only. However, free or purchased printables are NOT to be reproduced, hosted, sold, shared, or stored on any other website or electronic retrieval system (such as Scribd or Google docs). My printables are copyright protected and I appreciate your help in keeping them that way.
If you download and use some of my printables and then blog about them, please provide a link back to my blog and let me know - I'd love to see how you are using them! Please be sure to link to the blog post or web page and not directly to the file itself. Thank you!
LOVE, this is absolute genius. Will be making these at my son’s birthday party!
Enjoy, Janet – and have a fun party!
These are great! And just when I was wondering what I was going to do with my increasing collection of toilet paper rolls! Thanks for this awesome idea!
Have fun making them! :)