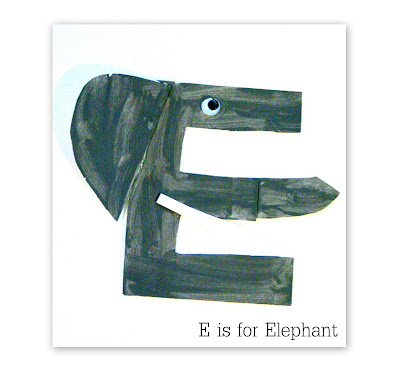
The saddest part of my week {ok, I exaggerate a little bit…} was discovering that our craft stores carry every shade of foam sheets and construction paper ~ except GRAY!! Do these people not know that elephants are just begging to be made by local preschoolers?
I got the idea from this post at No Time for Flash Cards. The kids have been loving the crafts {and the parents too, I believe!}.
What You’ll Need:
- Gray or white foam sheet/construction paper {our craft stores only had white}
- Scissors
- Pen {to trace letter}
- Paint ~ if you can’t find gray paper or foam
- Googly eyes
- Glue
How to make the ‘E’ Elephant:
- Trace and cut an uppercase ‘E’ out of the foam sheet or construction paper. I used a foam sheet that was about 4″ x 5″ in size. Since our craft store didn’t have gray foam, I used white and we painted it gray after we had glued it all together.
- Using the extra foam, cut out an ear and a trunk for the elephant. I used a little sliver of our white foam to also cut out a tusk for him.
- Glue the elephant’s trunk onto the middle section of the letter ‘E’.
- Glue on the ear and paint if needed.
- Add an eye and tusk to finish!


 The printables shared on this site are FREE of charge unless otherwise noted, and you are welcome to download them for your personal and/or classroom use only. However, free or purchased printables are NOT to be reproduced, hosted, sold, shared, or stored on any other website or electronic retrieval system (such as Scribd or Google docs). My printables are copyright protected and I appreciate your help in keeping them that way.
If you download and use some of my printables and then blog about them, please provide a link back to my blog and let me know - I'd love to see how you are using them! Please be sure to link to the blog post or web page and not directly to the file itself. Thank you!