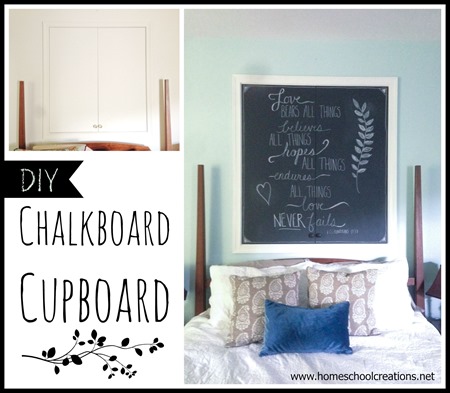
Ever since reading The Nesting Place by Myquillin Smith several months ago, I’ve been trying to take a few more ‘risks’ in decorating our house. Essentially that means stepping back from the fear of doing it all wrong (because that’s the camp I usually live in) and stepping out (sometimes on a limb) and just DOING something rather than wallowing in that fear. (Oh…this spills over into so many areas of our lives, doesn’t it?)
To give you an example, we had family pictures that sat, unhung, for years because I was afraid of a few silly nail holes. In my head they had to be aligned ‘perfectly’ – and well, really, they just needed to get up on the wall and I needed to be brave with the hammer. They aren’t perfect, but it’s ok. The main point of Miquillin’s book – it doesn’t have to be perfect to be beautiful (#idhtbptbb). Truthfully, this has been such a challenge to me this year.
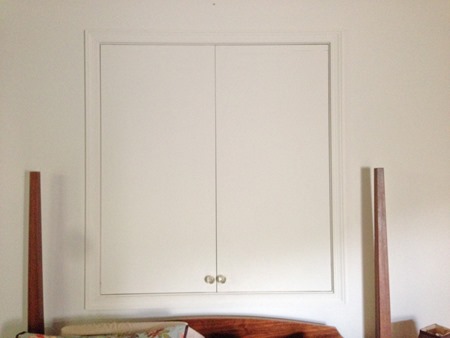
Out of all the rooms in our home, our bedroom has been untouched for the most part for the last 4.5 years. Blah walls with no paint and the UGLIEST CUPBOARD in the world stuck smack dab above our bed. Apparently it was meant to host a projection TV, and that is just not going to happen in our bedroom. Really – the cabinet is huge, framed in, you can’t miss it, and it has been driving me buggy.
The Inspiration

photo courtesy of Rachel Anne Ridge
Rick and I debated for a very long time on what exactly to do with this crazy wall/cupboard. After visiting a donkey in Texas and seeing the above gem, a little light bulb went off over my head – changeable art via a chalkboard! My friend Rachel made a chalkboard using an out-of-date picture frame (that’s her above with her daughter Lauren). If you’d like to she how she made hers using glass, watch this YouTube video.
Anyhow – that giant chalkboard was hanging over her guestroom bed and triggered the ‘aha’ moment. While knowing you can paint walls and glass with chalkboard paint, somehow it just never crossed my mind that I could paint the doors of this cabinet (yep, I’m quick like that!). That little revelation saw me spending this past weekend working on a complete bedroom overhaul while my hubby was out of town. Because why work on one simple, little project when you can cram a complete redo into a weekend project, right? I wanted to surprise him (I sorta did – he snuck home early and caught me painting), and we absolutely love, love, love the results!
The Process
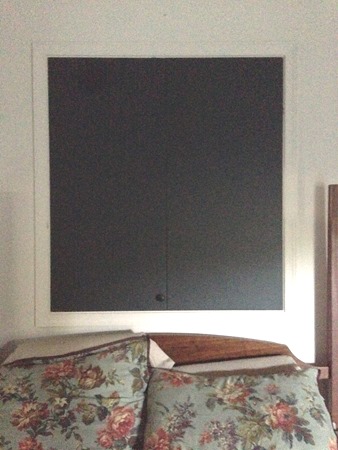
Painting with chalkboard paint was so simple and I just needed a few items for this project:
-
a 4” mini roller & pan
-
sandpaper to lightly roughen surface
I worked on painting the doors with Benjamin Moore Chalkboard paint and found some cute gray knobs to replace the faceted glass knobs that graced the doors. The chalkboard paint could be tinted any color, so I went with a slate gray color (1610) – not too dark or light. Using a 4” mini roller I applied 3 coats of paint over the course of 48 hours and then let it ‘cure’ for a few days. (p.s. A little paint goes a long way!! I only purchased a quart of paint and didn’t even use 1/3 of the quart…need to find more projects…off to Pinterest!!)
The Finished Chalkboard Cupboard
This weekend, while painting the walls of our room, I also painted the trim around the cupboard with a glossy white to make it ‘pop’ even more. Before adding any text to the board, we rubbed a piece of chalk over the entire chalkboard surface to prep the board. I haven’t wet it down, but used a soft cloth to erase and clean it.
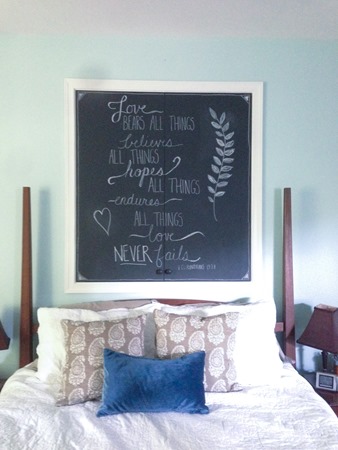
This is the finished wall (and new bedding). I am absolutely loving it. Over the last few weeks I’ve been finding fun chalkboard prints and quotes and pinning them for inspiration. The verse above is my attempt at this pin – not perfect by any means, but not too shabby for a first try either!
Really, the fact that the ‘artwork’ can be changed at any point based on season or mood – well, that just makes it even more fun! I’m now eyeing The Complete Book of Chalk Lettering to work on lettering and more projects!
And nope, I know this isn’t a typical homeschool post, but in many ways it is. My room is a haven for me. When it’s messy and crazy, it truly throws me off. Of all the rooms in our house that we try to stay on top of, this is it (well, that and the kitchen counters!). This completed project makes me want to sit in my room and just relax. Breathe. ENJOY a few minutes of rest – and well, we all need that, don’t we? Especially when we are surrounded by our kiddos all day (wink).
If you need me – I’ll be in my room.



















 The printables shared on this site are FREE of charge unless otherwise noted, and you are welcome to download them for your personal and/or classroom use only. However, free or purchased printables are NOT to be reproduced, hosted, sold, shared, or stored on any other website or electronic retrieval system (such as Scribd or Google docs). My printables are copyright protected and I appreciate your help in keeping them that way.
If you download and use some of my printables and then blog about them, please provide a link back to my blog and let me know - I'd love to see how you are using them! Please be sure to link to the blog post or web page and not directly to the file itself. Thank you!