20 Best Tips

Exploration Education Advanced Physical Science Review

Exploration Education is a blog sponsor and we received this product free for the purpose of reviewing it. All opinions expressed are my personal, honest opinions. You can read my full disclosure policy for more details. 
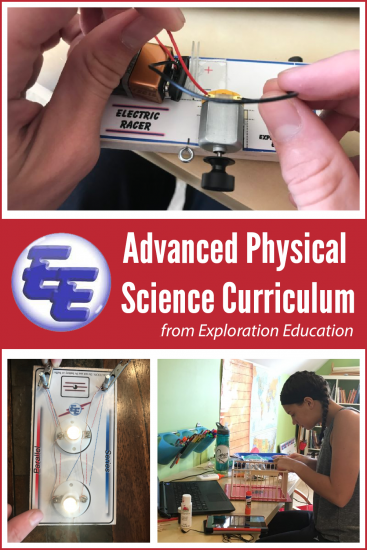
Taking a look back through our high school curriculum choices, there are very few programs that we have used consistently with all four of our children. There is one that definitely makes the cut though – every single time: Advanced Physical Science from Exploration Education.

We first heard of the program from a local friend and decided to use it in a small co-op setting for Laurianna’s physical science high school credit, way back in 2014. Since that time the company has made a few minor adjustments to the program, but the result is still an amazing, hands-on program that our children have loved and learned from! Next year our youngest will be starting his freshman year and we already have our box of material ready to go and plan to use it alongside a friend so our boys can enjoy the experiments and learning together.

About Exploration Education’s Advanced Physical Science
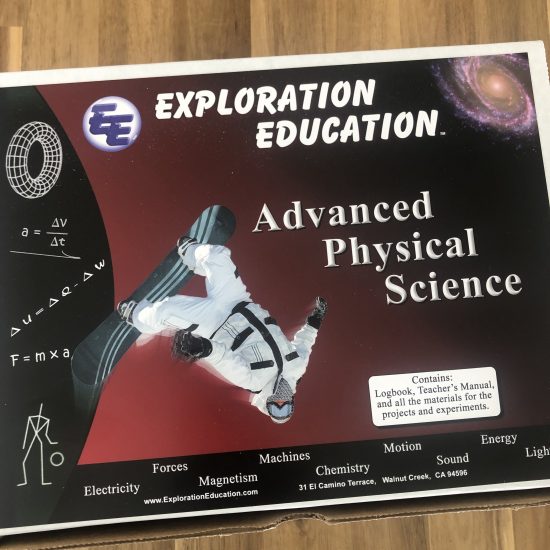
Featuring daily lessons broken down over thirty-six weeks, Exploration Education’s Advanced Physical Science class includes everything your family will need to earn a full high school credit. Rather than a dry curriculum, the program allows students to learn science concepts by using a hands-on and project-based approach: building, creating, and exploring through lab activities.

Each level of the program includes all the needed materials for the year (see a full list here).

  • Instructional Materials — student logbook, teacher’s manual, online access to the interactive student text.
  • Project Materials — motors, wood, solar panel, wire, bulbs, wheels, rubber bands, magnets, Alka-seltzer, etc.
  • Experiment Materials — nails, paper clips, sandpaper, pH paper, string, balloons, wire, steel wool, etc.
  • Templates and Sticker Pages — project templates, sticker pages, experiment supplements, etc.

Using the text and lab activities, students study forces, machines, motion, energy, electricity, magnetism, sound, light, density and buoyancy. Students will also study general chemistry concepts including the structure of matter, the periodic table, chemical bonds and reactions, mixtures and compounds and the chemistry of food and living systems. In addition, students will learn the fundamental physics concepts of the earth and solar system, thermodynamics, and fluid dynamics. Throughout this course, students discover the relationship between science and daily life. The students will gain a solid understanding of the scientific method and learn to write thorough and accurate lab write-ups.

course description of Advanced Physical Science
Watch a brief video overview here

Our Experiences with Advanced Physical Science

Advanced Physical Science from Exploration Education is the only science program we have consistently used in high school with our children, and I am so thankful to the mom who introduced us to the program so many years ago! Our three oldest have thoroughly enjoyed the program and projects, and we have so many fun memories over the years of the different labs we have worked on individually and with our friends.
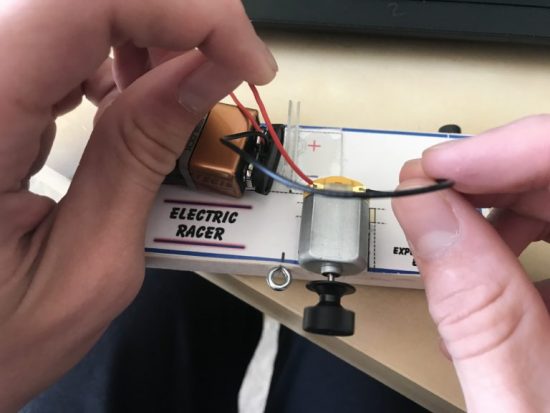
A typical week using Advanced Physical Science involves daily lessons with the first three lessons covering the overall concept for the week and the final two lessons going a little deeper and focusing on lab write-ups. The student text is online and interactive (when you first receive your program, you will register online and students will work through the lessons online).
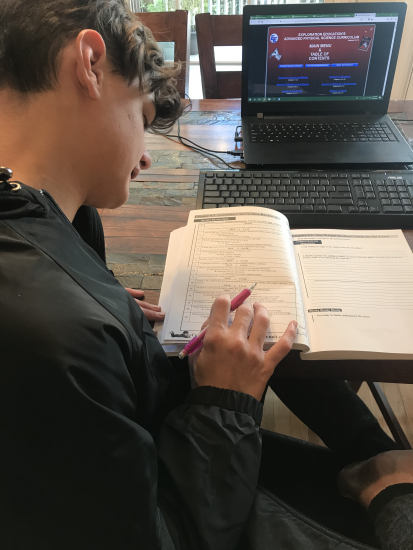
Students read the chapters on their computer and then answer questions on the computer and use their logbook to record their answers. Each of the 36 chapters are broken down into five lessons in the student logbooks (i.e. 1.1, 1.2, 1.3, 1.4, and 1.5) for students to complete and also use as review for quizzes and exams.

As a parent, I appreciate the variety the program offers: online and interactive text, the student workbooks to fill out, as well as the hands-on projects because it appeals to different learning styles, helping children remember and recall information by using these various methods. Our hands-on learners loved the building and creating, and lesson concepts were cemented into his mind because of this learning. The same child may have loved the steamboat project solely because it involved the use of matches.

With two of our children, we used the program as a part of a small co-op and it was a great fit. During the week we would study the lessons and work on experiments independently, and then once a week the co-op group would work on additional experiments and review the learning material together. Our co-op time was usually about an hour and a half or so – just enough to squeeze in a little more learning and review together if there were any experiments gone awry.
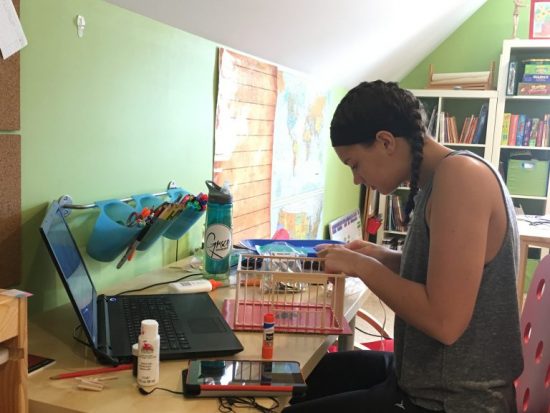
Personally, I love the way Advanced Physical Science incorporates so many different learning styles as it introduces science concepts. While some of the projects are more typical (completing a circuit, for example), the program includes a large amount of science projects and labs that you don’t typically see, such as the steamboat and the miniature house construction. These were some of our favorite projects because of that very fact.

What Moms Need to Know

Having the entire curriculum packaged neatly in a box for you is definitely a huge plus to this program! Each of the activities is neatly packaged and labeled, ready to be pulled out and used with your children. Literally all you need is inside the box, so all you have to do is activate your online access to the interactive text and start learning.
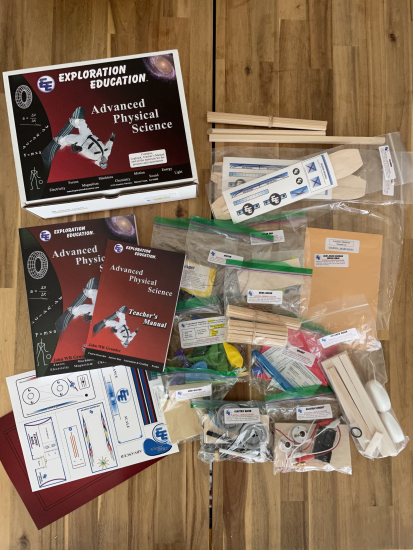
Teacher’s Guide – Each program includes a teacher’s guide with detailed helps, including blank quarterly exams, answer keys, and a grading rubric. As with any program, I highly recommend reading through the manual prior to starting. There is also a short online overview for teachers to go through online with tips for users.

Time Required – 36 weeks/5 lessons per week. Each lesson takes and average of 45 minutes to one hour. Also includes 40 lab hours.

Grading/Assessment: The teacher’s manual includes an area to record your student’s grades and progress. Throughout the course there are quizzes (vocabulary and section reviews) as well as quarterly exams. Grades are calculated using an average of weekly activity, quizzes, and exams.

Parental involvement: varies based on child, but time each week may require more assistance depending on your child since some experiments/builds require more detail and focus. For parents of children who like to skip steps, your attention to detail may benefit your child greatly. For example, SAVE YOUR EXPERIMENT MATERIALS because some of them will be used in future lessons (just ask me how I know).

Worldview – Text is written from a neutral worldview.

High School Credit: one high school credit can be awarded for this class. Approximately 150 hours with 40 hours of labs.

Perfect for grades 7-10.

Something for ALL Age Levels

Exploration Education offers three levels of science programs: Elementary (K -3rd), Standard (4th – 6th), and Advanced (7th – 10th). Learn more about the different levels HERE.

You can purchase any of the programs from Exploration Education on their website. Additional logbooks or kits can be purchased for students if you are working on the program with multiple children.

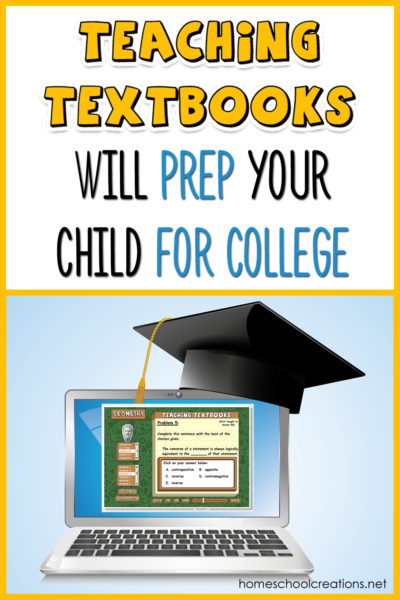
Teaching Textbooks Will Prep Your Kids for College

{disclaimer ~ this is a sponsored post in partnership with Teaching Textbooks}

Any of our long-time readers know that we have had a staple in our yearly homeschool curriculum. It’s a program we love and recommend whenever we can – Teaching Textbooks. As dedicated users of the program since 2010, we’ve had the opportunity to use every one of their math levels from Level 3 through Pre-Calculus.

One of the questions/concerns I’ve had from several parents over the years has tied into Teaching Textbooks and preparing their child for college. Will Teaching Textbooks be enough for college entry? And SATs? 

Here are some of my honest thoughts and opinions on the issue – and the short answer is this: I do believe that YES their program will prepare our children and is an incredible resource to homeschool families

Before I jump fully into things, I would invite you to read a little more about our switch to Teaching Textbooks back in 2010 and the overall reasons we recommend their program.  

When we first started with Teaching Textbooks, I heard and read various criticisms by some about their program. A few said it was behind other programs or that their kids used it and didn’t test well. Of course, criticisms like this are common with any widely-used math curriculum. But we had several friends who had no problems whatsoever, so we decided to move ahead because we needed a program that our kids enjoyed using – and that would help them learn.
Out of our four children, we currently have two children in high school, a child who has taken and done well on the SAT (and successfully graduated), and have had no issue with college acceptance or with Teaching Textbooks being our math curriculum. 
After the tenth grade, our oldest daughter took entrance tests in language and math so she could register for classes at our local community college (she did great on the math potion, by the way). Math is quite honestly her least favorite subject – just because she would rather delve into a good book, dissect a specimen, or learn more about human anatomy. She’s wired that way. BUT she did well on the math portion of the SAT as well, using zero outside prep other than Teaching Textbooks. (Side note: as we have completed standardized testing over the years, our children have tested highly in math each year).

Whatever criticisms we have heard have not proven true. We have seen success with Teaching Textbooks as our primary math curriculum for the past nine years. Teaching Textbooks will prepare for college – and it has!

Teaching Textbooks is a MUST for high school homeschool. 

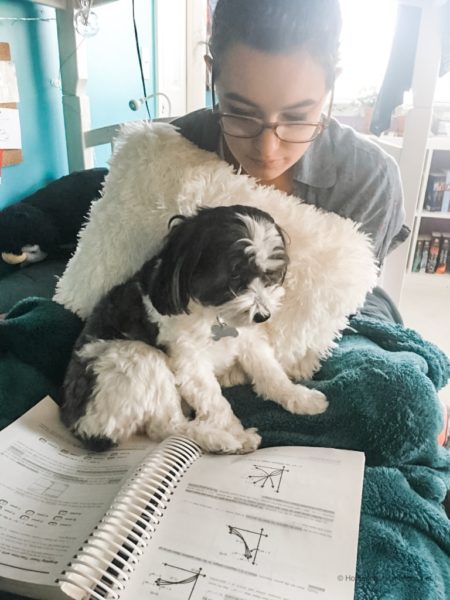
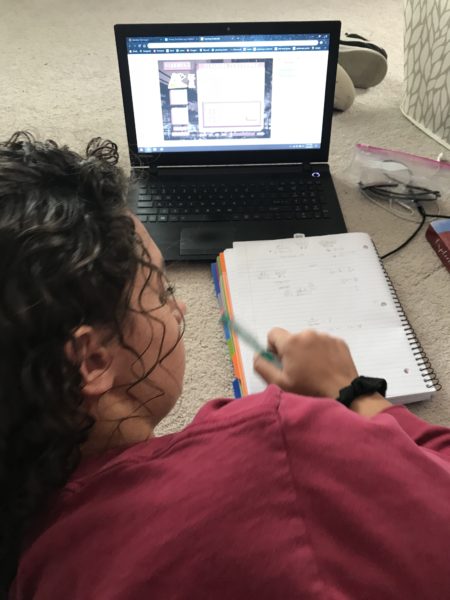
For those who struggle in math themselves, Teaching Textbooks is an amazing curriculum to have on hand each year. The lessons are all taught via the program, meaning you as a mom get a break and don’t have to remember al the concepts you may not recall from your own high school days. Each lesson has an instructor who walks kids through the concept being taught, works through sample problems, and then kids work on daily problems and/or periodic tests.

One of my favorite features, especially in the high school years, are second chances. Parents can allow the program to offer a second chance for a correct answer. For kids that get frustrated easily, this can be a huge help. Let’s face it: sometimes kids try to rush through a problem or enter an answer too quickly. If they make a mistake, they could take a second chance and try again to get the problem correct. 

On top of second chances, the program SELF-GRADES. For those of you working with high schoolers, this is an amazing mom-help. Yes, we definitely want a program that works well for our children, but the benefit to parents cannot be overlooked either. 

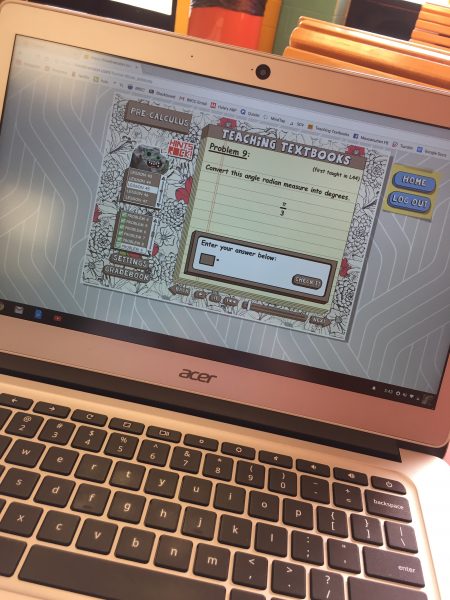
We started with the textbook and CD-Rom versions of the various levels and a little over a year ago we moved over to Teaching Textbooks 3.0, a fully-online version of the program (meaning access anywhere you have WiFi access – no disks needed).  

Something I do want to note: as with any other program/curriculum, parent participation/oversight is necessary. Our family has a policy that if the kids score a 90 or better on a lesson, they can move on to the next lesson. If they are having difficulty and/or score below a 90 on a lesson, we sit down with them to review the concept they are struggling with until they understand and are ready to move on. 

You CAN Jump Ahead (or stay on grade level)

All of our kids started at their appropriate level, and we gave our youngest a placement test before he started. As our kids progressed through and enjoyed working on math, we let them work ahead. Instead of tears, our kids enjoyed doing math. 

Now granted high school can mean differences in attitude (because not all kids enjoy doing school – grins), but as our kids have been able, they have worked at the level they are able to. For both of our girls, they started Algebra 1 in the 8th grade. When our oldest reached the Pre-Calculus level, she decided to break it up over a two-year period (her 11th and 12th grade year), and that worked well for her and her school schedule.

Currently we have a 9th grader who is finishing Algebra 1 (he started it in the 8th grade), and he will move on to Geometry when he completes Algebra 1. Our 11th grade daughter started Pre-Calculus this year and her goal is to complete by the spring, wrapping up her math for high school. 

A Few Other High School Notes

  • Each level of Teaching Textbooks high school math is equivalent to a full high school credit and they currently offer Algebra 1, Algebra 2, Geometry, and Pre-Calculus. 
  • A quick look at the gradebook will show you if a lesson is FULLY complete. This is one of my FAVORITE new features that has been added to the program. Prior to this update, the parent had to do a little more digging in the grade book to see if a lesson was 100% completed, but now – there isn’t any hiding if a kiddo “forgets” to do a problem.
  • Print gradebooks anytime.  Maybe I’m not the only one who struggles to keep up-to-date records on subjects, but Teaching Textbooks grades it all for me, and grade books can be printed off at any time for quick and easy record keeping.
  • With the 3.0 version, Teaching Textbooks stores your grades for you, even after your subscription is over. You don’t have to worry about where that grade book disappeared to – they’ve got you covered. 
  • All of the Teaching Textbooks 3.0 programs work on MAC, Windows, and Chromebooks.  For our family, the Chromebook aspect was HUGE since we didn’t have a disk drive. The full Teaching Textbooks 3.0 was one of the few programs we didn’t have any issues with! 

Prior to starting high school, Teaching Textbooks was a lifesaver for our family, allowing the kids a chance to work through math at their pace and independently, while also enjoying the process of learning. As we’ve moved into high school it has continued to be a benefit to our family,

More on Teaching Textbooks

Try Teaching Textbooks 3.0 for FREE


If you’d like to test out the 3.0 version, you can start a Free Trial of the complete program, up through Lesson 15. The trial includes lectures, solution, eBook, and grading on each of the products. If you decide to purchase the full version, everything transfers over for you! 

And bonus – you can try ANY and EVERY level. They are that generous! Learn more HERE. 

Not sure where to start? Download and print a placement test online. 


Win a Subscription to Teaching Textbooks 3.0

Teaching Textbooks has generously offered to give ONE FREE SUBSCRIPTION (any level) to Teaching Textbook’s new 3.0 version to one of my readers!! The Rafflecopter widget below will give you instructions below, and includes the option of the free trial as well. :) Because it is an online platform – everyone can enter, provided they are 18 years of age or older.

Giveaway ends Monday, October 7th at midnight EST. 

a Rafflecopter giveaway

All About Reading 4 – Full Color Version (Review)

Our family received access to the full color AAR Level 4 in exchange for our review. All opinions are our honest thoughts and we have been using the program for years during our school time. Please see our disclosure policy.

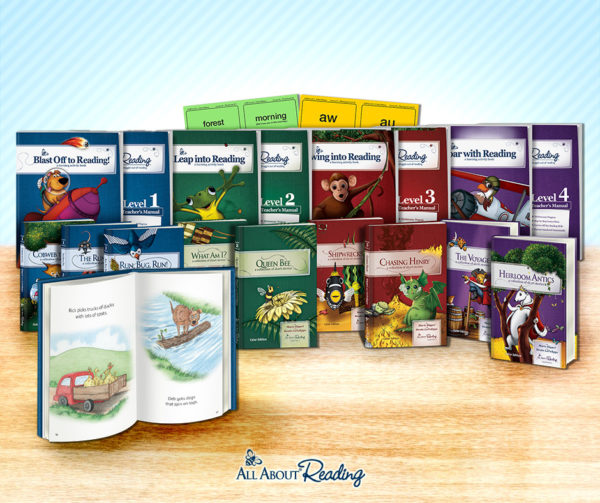
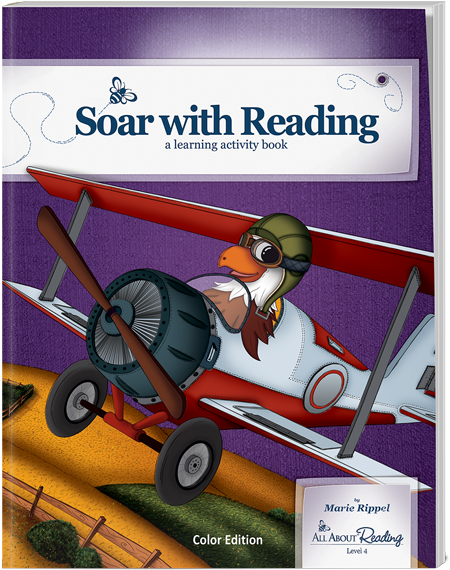
A little over a month ago, All About Learning Press released an update to All About Reading Levels 1-4 – and truly, they are stunning! What was already an amazing product and tool for homeschool families has stepped up to the next level and is now full-color – both inside and out! 

I can honestly tell you all that we have owned all of the products from All About Reading and All About Spelling, use them daily, and love them tremendously. Their curriculum is one of the first that really got me excited about teaching and I KNOW that they are getting solid teaching using the programs! But – enough about that – I cannot wait to share the updates that have been made to their reading program!

Our previous All About Reading Reviews:

Introducing the *Updated* All About Reading 4

All About Reading is a step-by-step reading program for children and uses a multisensory approach. Lessons are sequential in order, building on material  learned in prior lessons and levels, and ensure that your child is fully grasping concepts and successful in reading before moving on. Just because the lessons and levels build on each other though, doesn’t mean you can’t jump in at any time. We’ve had kids that have worked through every level and some that have gone through only a few.

If you have used any of the All About Reading levels in the past, you are well familiar with the cute graphics, well laid out lesson plans, and the hands-on learning the program provides. The only thing the program didn’t provide was full-color print. 

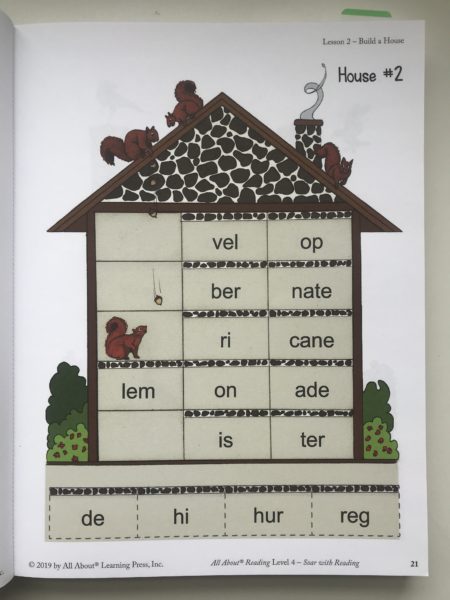
Previously all of the go-along activities, book illustrations, and even the teacher’s manual were available only in black and white. Until now. (Insert happy dance).  While I love, love, love the color illustrations in the readers – can I pause for a moment and share my *joy* with the full-color teacher’s manual??

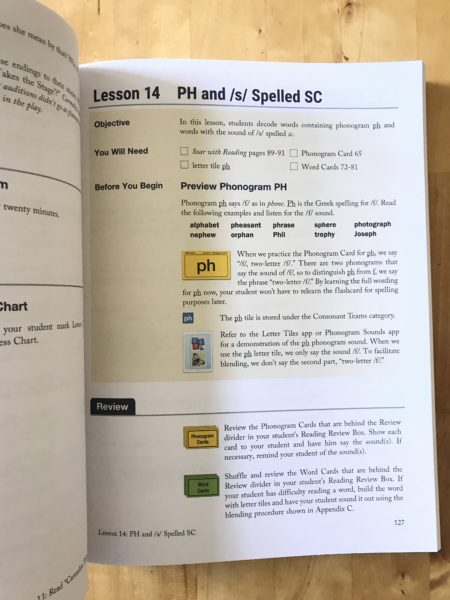
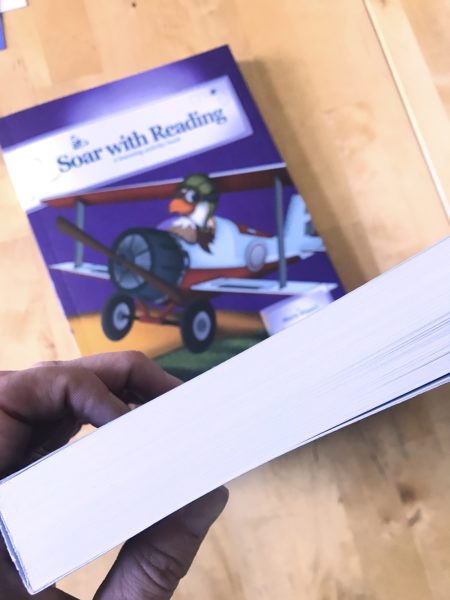
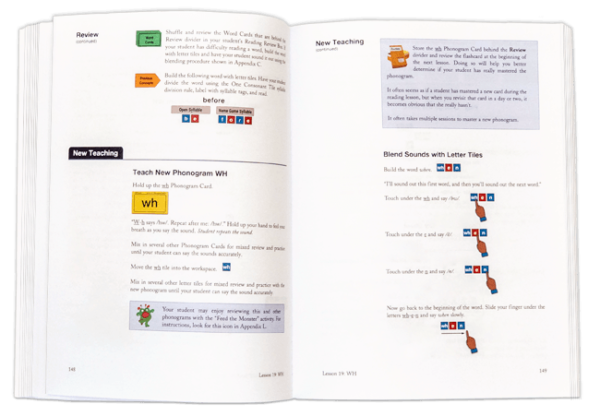
The teacher’s manual alone is so much bigger than it used to be (thanks to the paper quality). The content though is the same step-by-step lesson plans, just in full color, ready for you to literally open the book and start teaching your child. 

For those of us who are visual learners, this manual is flat out amazing. Seeing what color the cards are, letter tile colors, and even pages in the activity book helps so much, especially when you get into the upper levels of reading and add in extra letter tiles with new colors. 

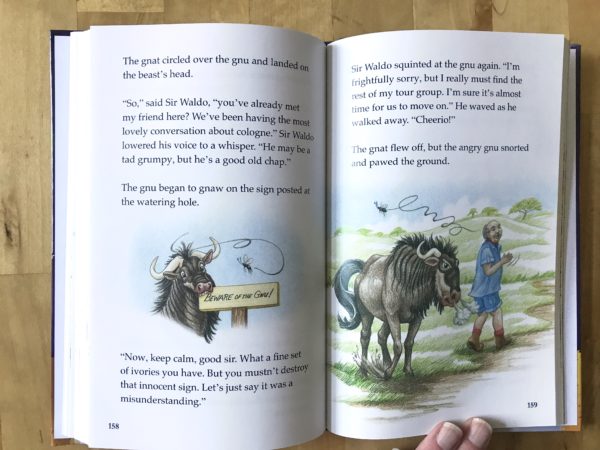
The readers have so much to love. In addition to their colorful illustrations, they all feature whimsical stories you won’t find anywhere else. These aren’t your “cat sat on a mat” type stories – they are funny and include lots of concept review. In addition, the illustrations don’t give away what the story is about, limiting kids from word guessing – they have to focus in on their decoding and reading skills. 

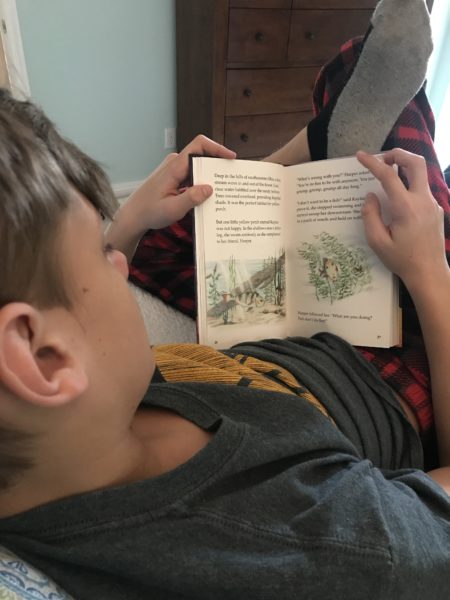
While I loved the classic look of the black and white illustrations in the previous version of All About Reading, these hardcover readers are so much more engaging than before (and that’s a good thing for those picky kiddos). They are still the same compact size, fitting perfectly into kid’s hands, and lay flat when open for reading. 

What Comes with the Level 4 Program

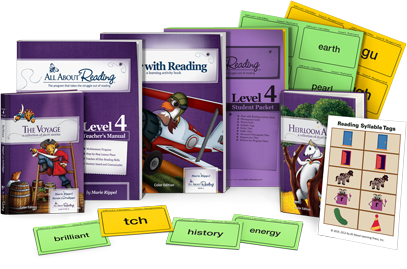
The All About Reading Level 4 Kit comes with the following items:

  • Level 4 Teacher’s Manual
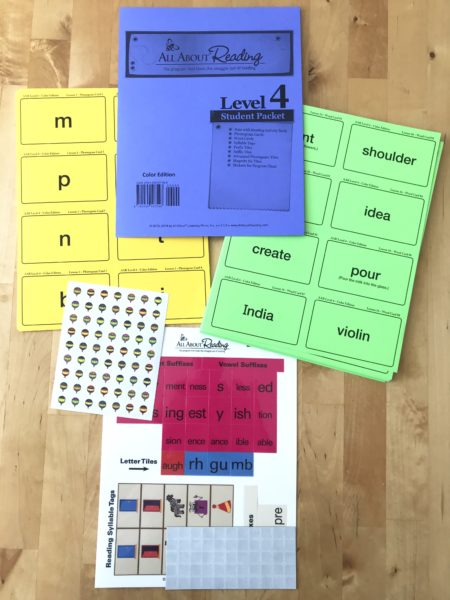
  • Level 4 Student Packet {includes word cards and an Activity Book}
  • Heirloom Antics reader
  • The Voyage reader

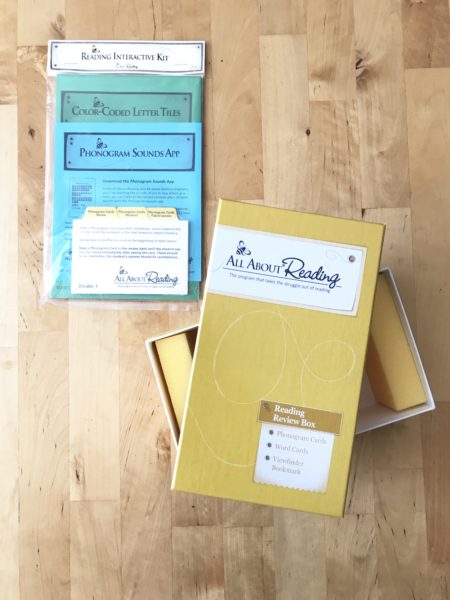
You will also need a Reading Interactive Kit to complete the program. Choose between the Deluxe Reading Interactive Kit {$43.85} or the Basic Reading Interactive Kit {$21.85} ~ or buy the pieces individually. The reading kits are a one-time purchase and will be used in all levels of the program.

A peek at what’s covered in AAR Level 4

Decoding (Phonics)

  • Learn phonograms EY, EAR, UI, IE, PH, GU, GN, AUGH, EI, OUGH, SI, MB, OUR, CI, and RH
  • Read words containing the new phonograms, such as honeyearlyjuicefieldphaseguestgnatdaughterbeigeroughmissioncombjourneyspecial, and rhyme

Decoding (Structural Analysis)

  • Decode multisyllabic words
  • Read words with multiple suffixes, as in thankfully
  • Read words with a variety of suffixes, including -ible-able, –ance-ence-sion-ic-al-ous-ist-ism-ity-ize-ary, and -ery
  • Read words containing unaccented syllables, as in pirateAlaska, and doctor
  • Read words with silent letters, as in half and comb

Fluency

  • Read with accuracy
  • Read with meaningful expression
  • Read with natural phrasing

Vocabulary

  • Discuss new words in the context of the story and one’s own life
  • Explore varying dialects and regional language
  • Understand homonyms and heteronyms
  • Understand synonyms, antonyms, onomatopoeia, alliteration, idioms, personification, acronyms, and hyperbole
  • Explore words containing influences from Greek, French, Spanish, and Italian

Comprehension

  • Connect text to one’s own experiences
  • Read stories with alternating points of view
  • Make predictions and inferences
  • Compare and contrast main characters and stories
  • Discuss main conflict and character transformation
  • Skim for specific information
  • Discuss shades of meaning
  • Summarize the text


Our Thoughts on All About Reading 4

Our youngest, Kaleb, has struggled with reading from the beginning, and All About Reading has been a great fit (and help) for both of us. We’ve tried to add in additional things over the years, but they only end up confusing him more. 

The steps and rules in All About Reading help continually reinforce what he has already learned and build on his learning. While we have already worked through and finished Level 4 last year, we decided to go through it once again to build Kaleb’s reading confidence. He struggles with rushing through things and then freezes and gets flustered when he realizes he doesn’t have it right. He KNOWS the rules and has a solid base, but needs to realize 

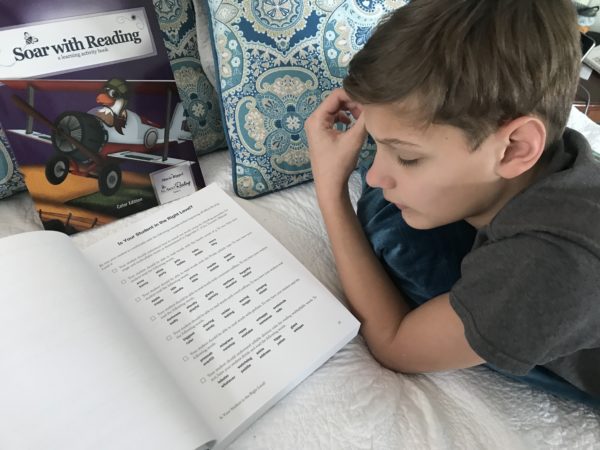
The beginning of the book offers a mini “test” of sorts to see if your child is ready for the level. You can also try out their online reading placement tests to find the correct level for your child. 

One thing we love about the reading programs from All About Learning Press are the hands-on activities and manipulatives that go along with each level. Each interactive kit includes Letter Tiles, Magnets, the Phonogram Sounds App, and Divider Cards. (This is a one-time purchase and can be used with all levels of All About Reading.)

Probably the most time-consuming (and we’re talking about 20-40 minutes depending on what you decide to do) is the pulling apart of the phonogram and word cards that are a part of the student packet. (It’s here that I will note: I timed myself and came in just under 20 minutes to organize them – they are perforated and tear apart easily. If you decide to use the letter tiles, magnets need to be added to the back of each tile. You can alternately choose to use the Letter Tiles app instead.)

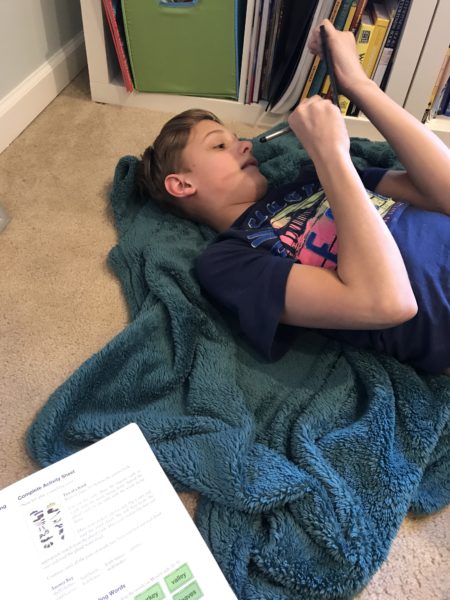
We alternate between the whiteboard with letter tiles and the letter app – and then sometimes just use our BoogieBoard or paper to work on any concepts we are learning. In just the few short weeks we have been working through Level 4, it’s already made a huge impact on his confidence in reading and his reading aloud. Reviewing the concepts and refreshing the phonics rules has given him time to pause, recall, and slow down as he reads. 

Each level of All About Reading also uses a go-along student activity book. Children can tear out the pages and complete the activity, making a great hands-on/tactile addition to the lesson. Below is a quick video clip inside the Level 4 Student Activity book. 


Things for Parents to LOVE

  • The bulk of the components are non-consumable (only the Activity Book and the stickers cannot be used again). This means that you will be able to use the program with your younger children and just grab a new activity book. 
  • Pre-planned lessons ~ taking extra time to plan lessons is tough, so let the book do the work for you. You can literally open the book and start teaching since all the lessons have been laid out for you.
  • Minimal prep-work. The word cards are perforated, but need to be torn apart (took me 20 minutes – I times it), and the letter tiles need to be assembled with magnets. Once that is done, you can grab your manual and go. Or you can save a step and use the new letter tiles app instead of the tiles.
  • The Go Ahead and Use It One-Year Guarantee’. You and your child have a full year to try out the program! If you find that the curriculum does not meet your needs, simply return the materials at any time within one year of purchase for a full refund of your purchase price.


a Rafflecopter giveaway


A Few Frequently Asked Questions (and Answers) 

Q: Will my current editions work with the new color edition?  
A: YES! If you already own a current version of All About Reading, there is no need to upgrade. The new Color Edition materials can be correlated seamlessly with the current black-and-white editions. Easy-to-use Correlation Guides for all levels will be available on our website after the new edition is released. The only exception to this is Level 1/1st edition which does not correlate with either the 2nd edition or the color edition.
 
Q: When can I order the All About Reading Color Edition?
A: We will begin accepting orders and shipping product on January 10, 2019. All About Reading orders placed before January 10 will be for the black-and-white version.
 
Q: Will you continue to carry black-and-white versions after the color edition is released?
A: No. Black-and-white editions of Levels 1-4 will only be available until January 9, 2019. After that date, we will give you the name of a retailer who still has black and white editions in stock.
 
Q: I just bought a level of the black and white version. Can I get the color edition instead?
A: Yes! Because of our 1-year money back guarantee, you can return your black and white version for a full refund (even if it’s partially used!) and order the color edition when it is released on January 10 at the new price. 

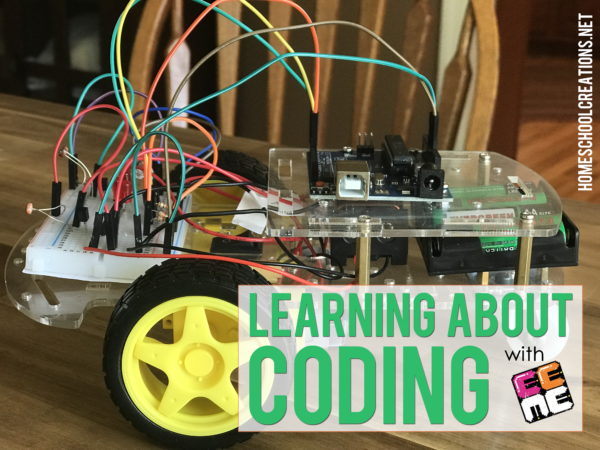
Learning about Coding with EEME’s Uno Board

EEME is a blog sponsor and we received this product free for the purpose of reviewing it. All opinions expressed are my personal, honest opinions. You can read my full disclosure policy for more details. 

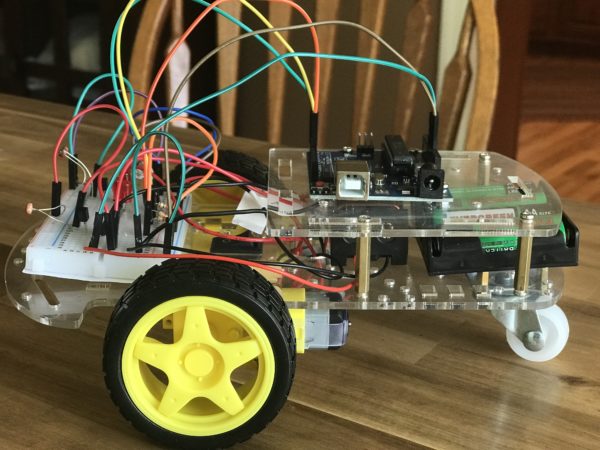
Just before the school year ended, we shared about Kaleb building Q the robot from EEME. We were then in the throes of packing for our European adventure and the day before we left, another box arrived from EEME for the Uno Board. 

One thing that can be frustrating about other STEM projects is you build it and that’s the end – nothing more. With Q the Robot though, EEME has created a series of projects that build on the framework of what your child has already started. The base remains the same and children essentially add more brains and smarts to their robots. 

That is a win-win!

The Uno Board is not a stand-alone project – meaning you cannot purchase just the Uno Board and have your child work on it. Children start by building the Q the Robot project kit, a 3-wheeled robot who follows light. He is the first in a series of robotics projects from EEME – and there is no coding required to get started! Once completed, Q follows light around using two sensors, or photo resistors. When light is shined directly onto the sensors, Q turns to follow the light. 

The kids “beef up” their robots with (and I quote, because I could never in a million years say this) “an Arduino-compatible UNO microcontroller board”. With the Uno Board, concepts covered include:  

  • Coding programs for the UNO board
  • What a compiler does
  • A coding language called C++
  • What all those holes, pins on the UNO board do
  • How UNO powers up

Adding the Uno Board

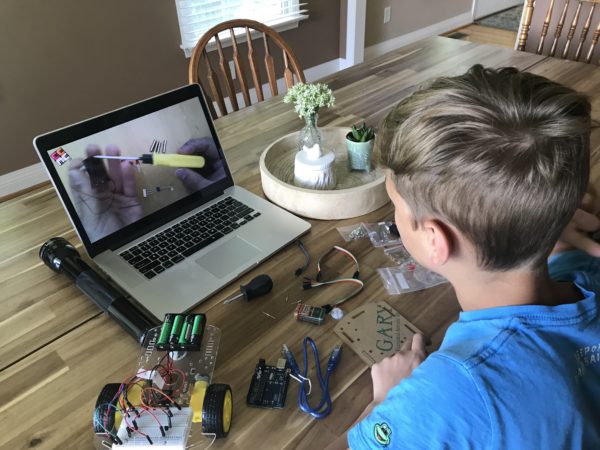
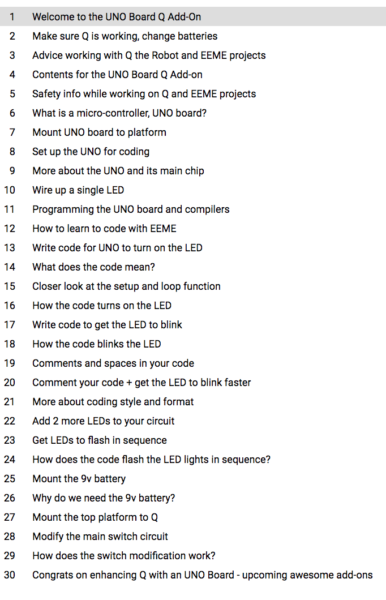
EEME has FREE online lessons (anyone can view these!), and this is where we went to begin our work with the Uno Board. The first several lessons covered the components we needed for the project (all included), safety, familiarizing ourselves with the projects, and getting the board connected to Q the robot for programming. 

We divided the thirty video lessons for Uno Board into two segments over the course of two days. Each of the 30 videos range in length, but average time each day was a bit over an hour, taking us a almost 2.5 hours to complete the entire project. 

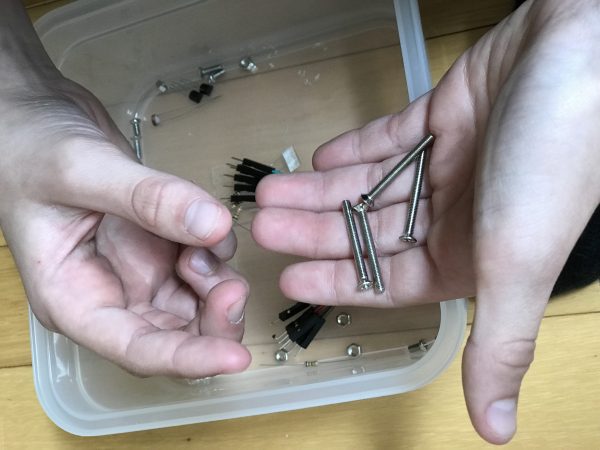
There are some super tiny screws and pieces that will require a bit of patience at times – completely doable, but just a heads up. :) 

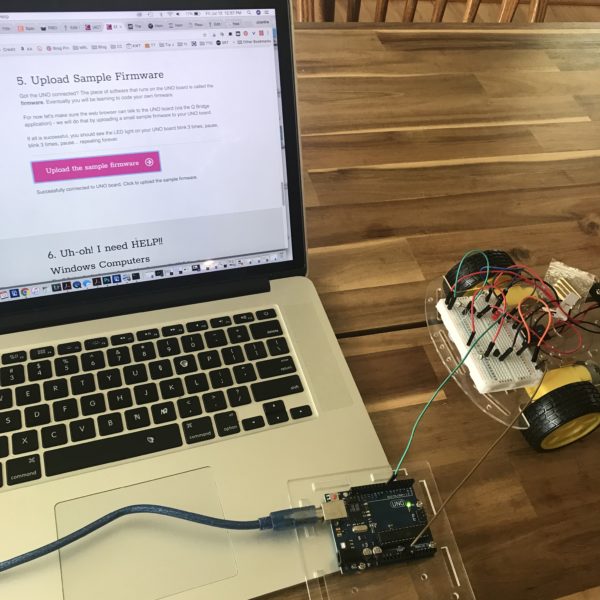
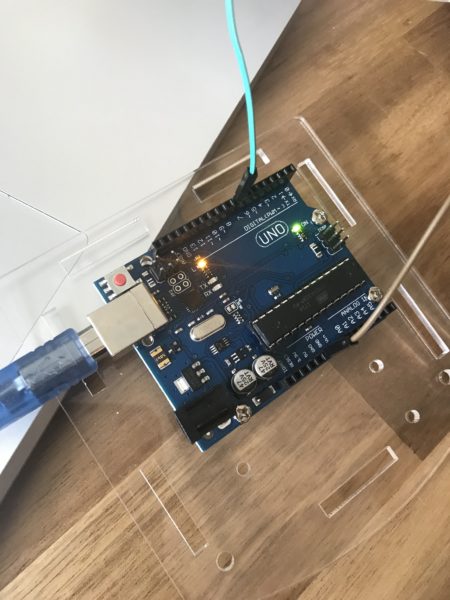
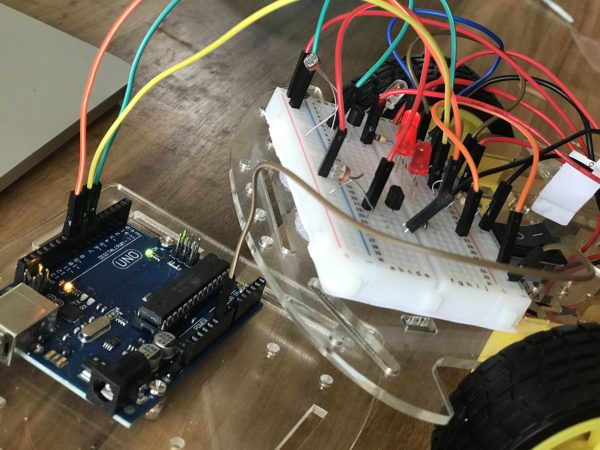
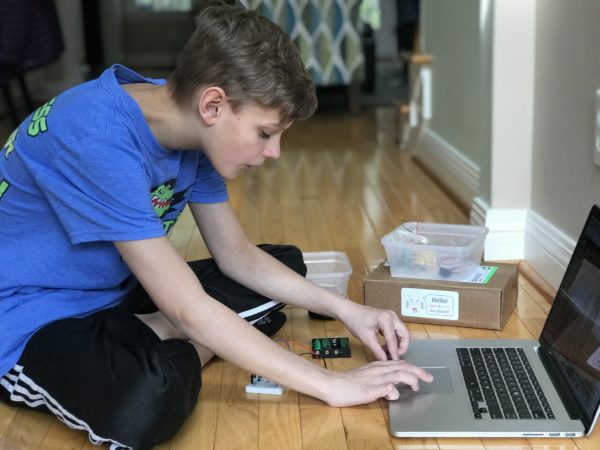
One thing we had to do in the early stages was download some firmware to “test” and make sure our board was working correctly. This step took us a little bit of problem solving (all questions that were answered via their site), but because we had a Mac, we required a different patch for our test. Once we had that figured out, we were good to go! 

(The green light is a good thing.)

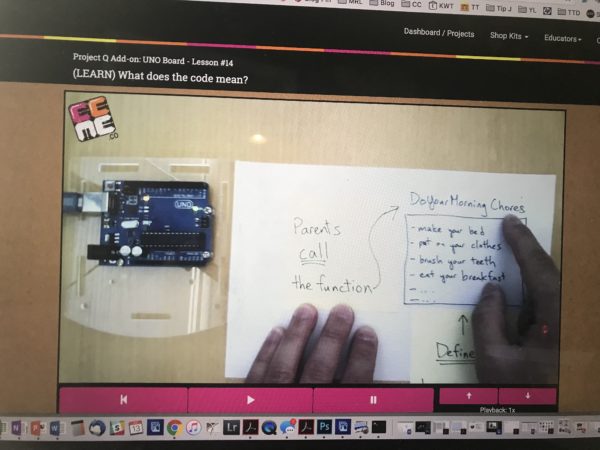
One thing to love about the video lessons is the way EEME dad ties in practical/real-life to help kids understand the terms. The above lesson is teaching about coding and broke it down by showing that coding is essentially giving kids the steps to a function. When parents ask you to work on morning chores (function), there are certain steps that define that function. 

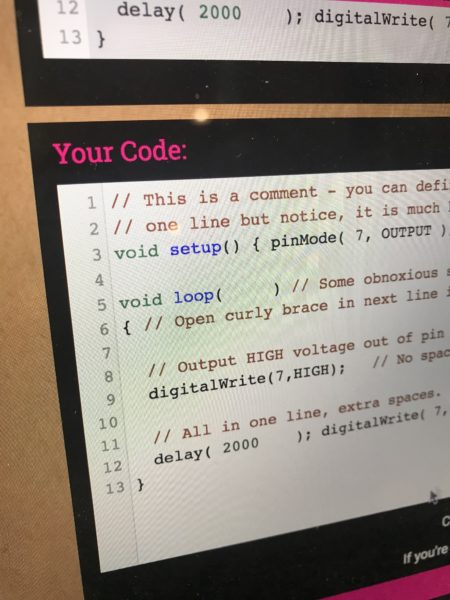
The hardest area for us was more the actual coding. In this section, I will admit that we bypassed a little bit, but only after Kaleb and I talked through the coding. For kids to learn and understand how the coding works, EEME recommends that kids type through the coding – it is provided in a box above and kids copy it line by line. 

I 100% agree that we learn best by doing ourselves, but in this instance, Kaleb and I would go through it and I would have him point out the various functions. Because I had a broken arm at the time (and had limited use of the computer keyboard) and Kaleb struggles with typing, after we discussed the coding, we did copy/paste from the provided coding. For a few of them I would omit certain segments and have him point out where the errors were. That said, the program itself does recommend kids work through it step-by-step. We didn’t follow the directions. :)

Each time new coding is entered, there is an opportunity to test it to see what that specific coding does. Honestly, so fun. 


Above is a super short video clip Kaleb took showing the light sequence coding he worked on. 


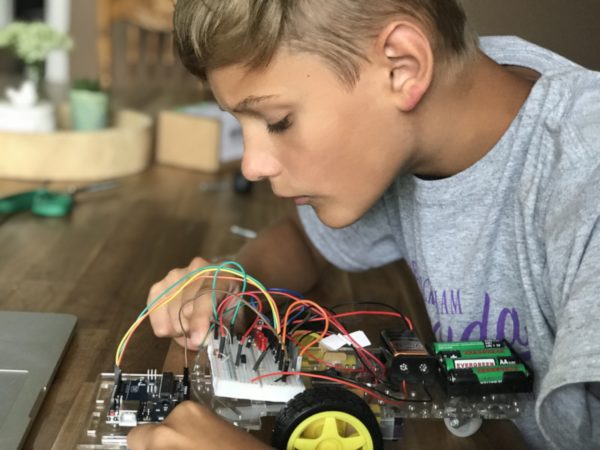
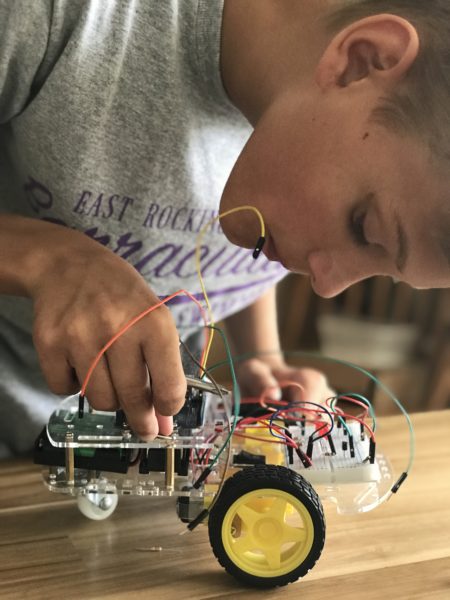
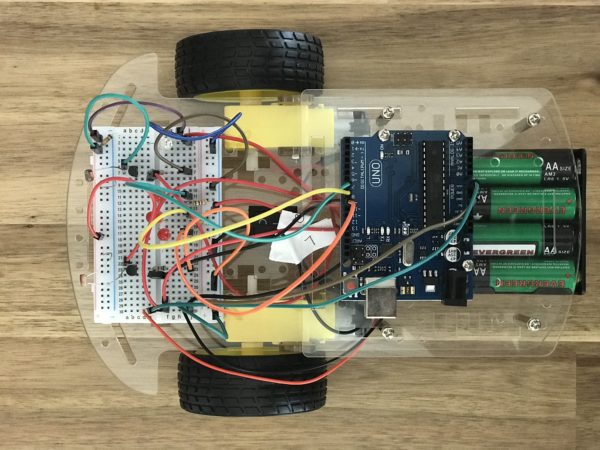
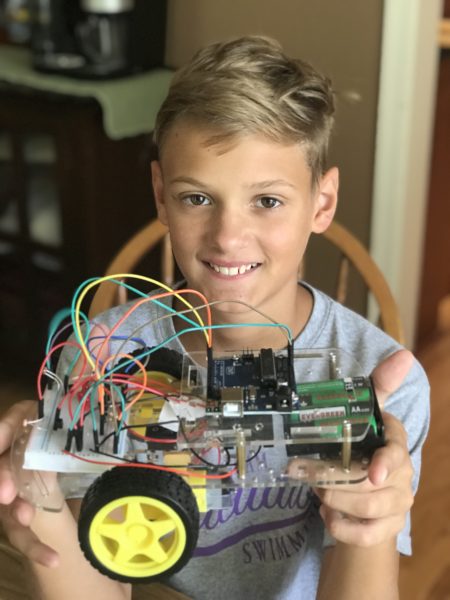
Once the coding was completed, Kaleb mounted the platform onto the top of Q the Robot. Prior to this point, the Uno Board was connected but off to the side. 

This step was a little trickier at times because there are so many more wires now and he was trying to make sure everything stayed in place (he may have knocked one out by accident and had to backtrack to see how we had the wires connected). 

After about two hours and 15 minutes total – the Uno Board was fully mounted and working! 

And now – we’re ready to work on the next step with Q the Robot to make him even better! 

What I will say after this step – Kaleb is 11 and a bit of a perfectionist. He wants to have things done well and correctly, so there isn’t any rushing through. If something isn’t working right, he at times gets frustrated with himself, so I sat alongside for the lessons and helped him flip back through pictures we had taken to look and see how wires were connected if he accidentally unhooked something. 

If our older son (age 13) were working on this, he would not need the 1:1 help (he might as for a hand occasionally), but much of that is also personality differences as well. It can be done and may need to be broken up into smaller chunks as well. 

What Moms Need to Know…

  • Everything’s included – parts, wires, batteries are included in all every kit
  • No experience needed – the online lessons to mentor, guide, and teach your kid (seriously, this is a lovely thing)
  • Safety first – no soldering required, low voltage projects (the mom in me rejoices)

Meanwhile, kids are learning solid concepts and being challenged by building projects using REAL components. They may make mistakes, but in doing so, they learn to review and discover what they can do to make it better and work correctly. 

Perfect for ages 10+

Time Required: 2-2.5 hours

Parental involvement: varies based on child, but this one may require more assistance depending on your child’s keyboarding/typing skills since it does involve more detailed computer usage. 

Start Learning With EEME

There are 3 ways to learn with EEME – FREE online lessons, their robotics kit series, and their electronics kit series.

  1. For free online lessons – families create a free account with EEME and use their web browser to interactively build and learn about electronics circuits.

2. Robotics series – The first kit of the series, Q the Robot, is a project where your child builds a 3-wheeled light-following autonomous robot. The online lessons associated with Q teach how robotics circuitry works.

You can purchase Q and additional add on kits here.

3. Electronics series – electronics kits are purchased as electronics kit monthly subscriptions. A new bite-sized kit ships every month complete with all the electronic components needed to build a new project.

Each month’s project builds on the previous month’s knowledge and interactive quizzes, questions reinforce kids’ understanding of the why’s and the how’s. 

Learn more about the electronics monthly subscriptions here.


Be sure to take a look around the EEME site. If you have kids in the 7-10 range, they have a monthly subscription option where each project focuses on a different electronic concept, but otherwise – go for Q!

Past EEME Projects

We’ve worked on several other projects from EEME. If you’re interested in learning more about their monthly subscription program, be sure to check out the below posts for more information:

Building a Robot with EEME

EEME is a blog sponsor and we received this product free for the purpose of reviewing it. All opinions expressed are my personal, honest opinions. You can read my full disclosure policy for more details. 

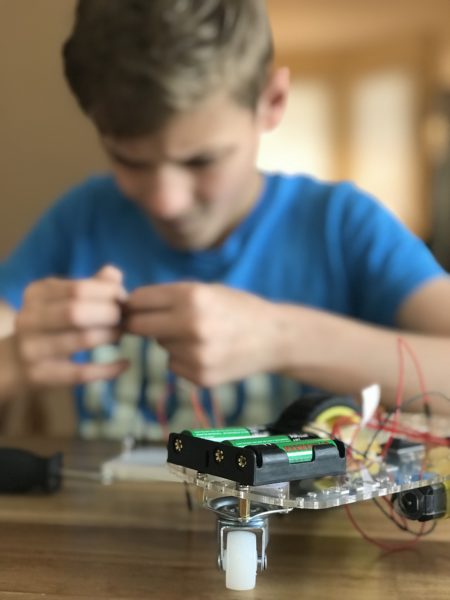
Recently we shared Kaleb’s work on building Q the robot from EEME. Before getting to the finished (and fun!!) part of watching his robot move around, there were steps of learning about circuits, how motors work, and so much more. 

In short, a little bit of patience. 

The finished project though – so much fun to shut the blinds in the house, whip out the flashlight, and guide Q around the house! Especially when you see all your hard work pay off.

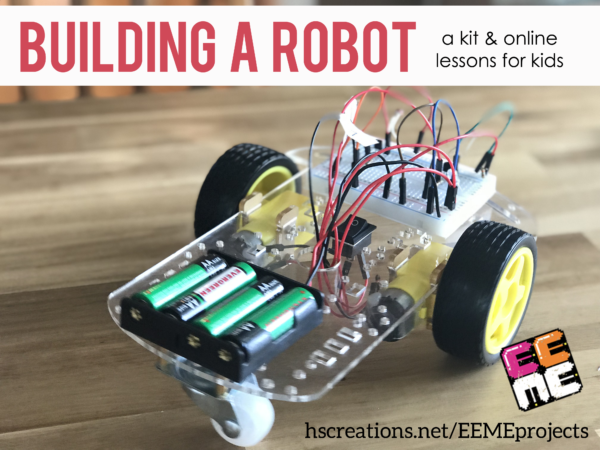
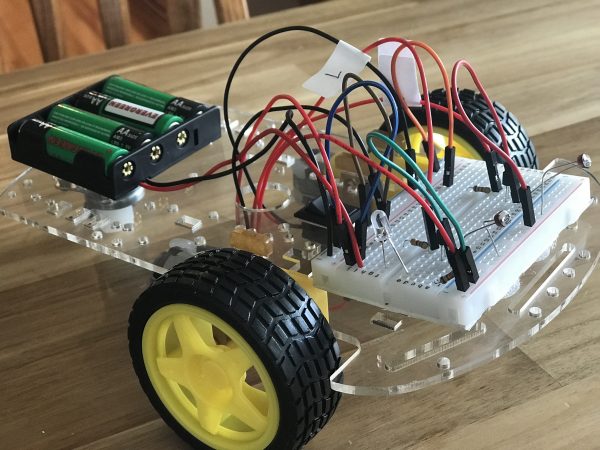
Q the Robot is a project kit that guides your child through the process of building a 3-wheeled robot who follows light. He is the first in a series of robotics projects from EEME – and there is no coding required to get started! Once completed, Q follows light around using two sensors, or photo resistors. When light is shined directly onto the sensors, Q turns to follow the light. 

Building our Robot

Using the FREE online lessons (anyone can view these!), Kaleb learned first about all the components that go into building this particular robot: breadboards and how circuits are completed, making the motors turn in different directions, powering the robot, photoresistors,  and finally had a chance to start building the actual robot. 


If you don’t know a thing about electronics, don’t worry. There are step-by-step videos that will walk your child (and you) through the process, and that includes explaining all the various parts and exactly what they do. 

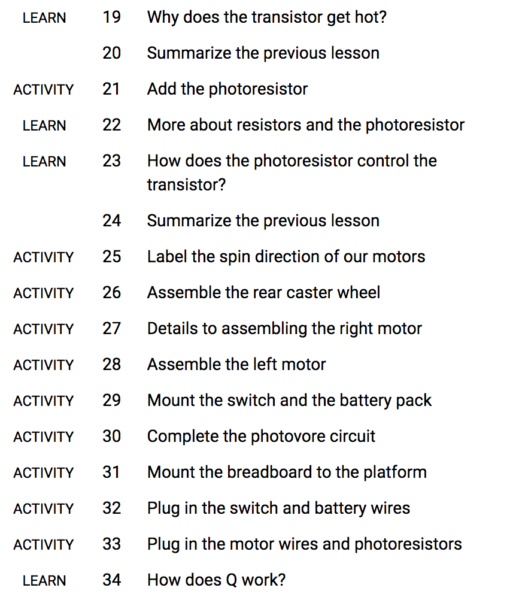
We initially broke the video lessons for Q the Robot into three segments and over the course of three/four days: lessons 1-10, 11-20, and 21-35. Each of the 35 videos range in length, but average time each day was between half an hour to  45 minutes, taking us a little over two hours to complete the entire project. 

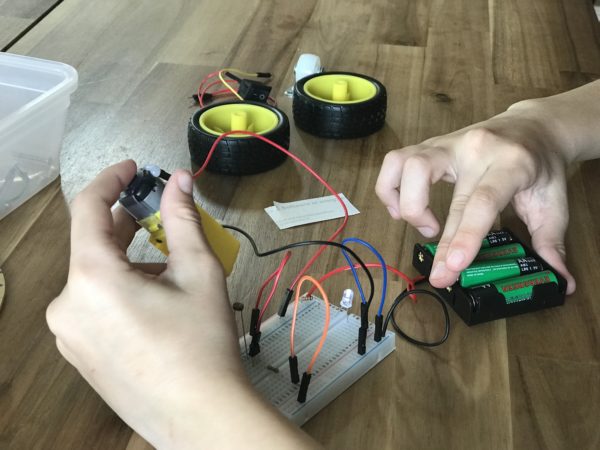
Our first step toward finishing Q was learning about photo resistors. The battery back was temporarily hooked up again with one of the motors to see how the circuit was completed and would function. You can see the photo resistor just to the right of Kaleb’s left hand. Later there will be two that will help “guide” the robot based on the light that shines on each resistor.

After learning about the photo resistors, Kaleb was finally able to pull out the main platform and start assembling the body for Q (lesson #26). 

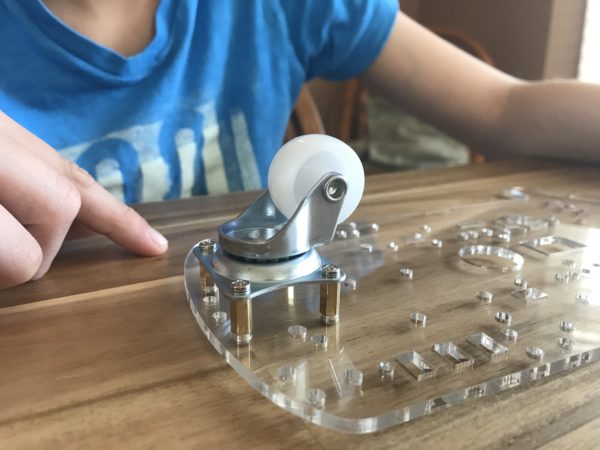
The back of Q features a single caster that allows the robot to pivot or wiggle back and forth as it moves. 

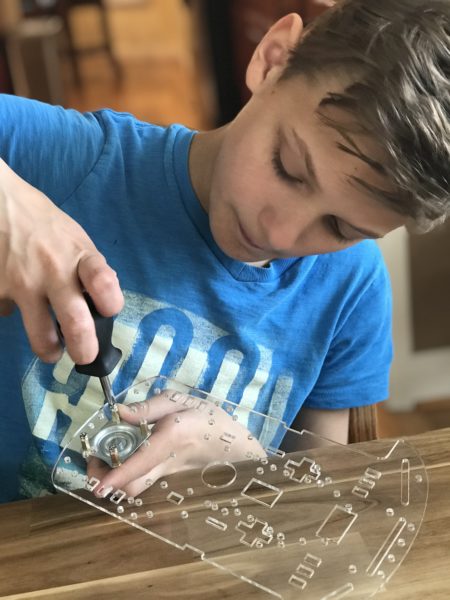
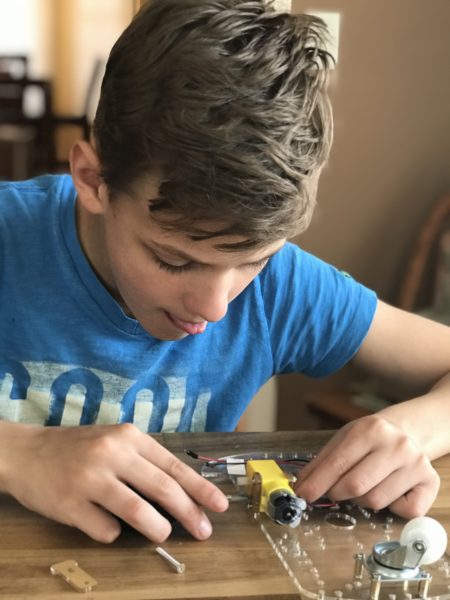
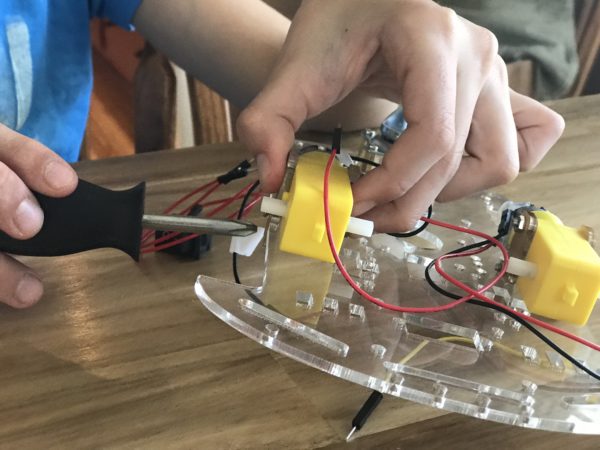
The next steps (#27-28) may have caused a little more frustration for Kaleb. In assembling the motors and attaching them to the platform, it was a little trickier for him (he kept dropping one of the screws and missing the hole). 

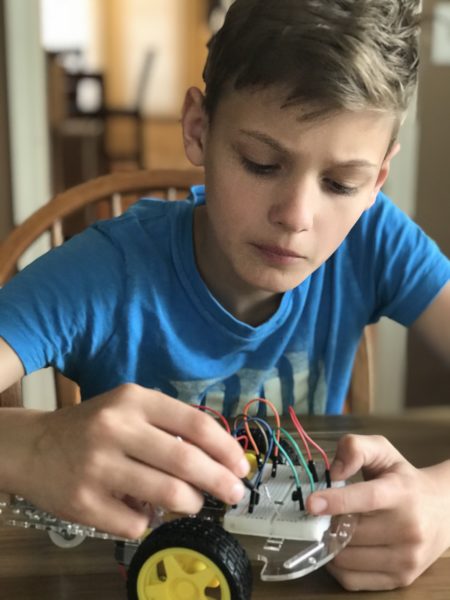
Can I tell you what I loved at this part though? His utter concentration, shown by the tongue that stayed half stuck out of his mouth for the remainder of the building process. 

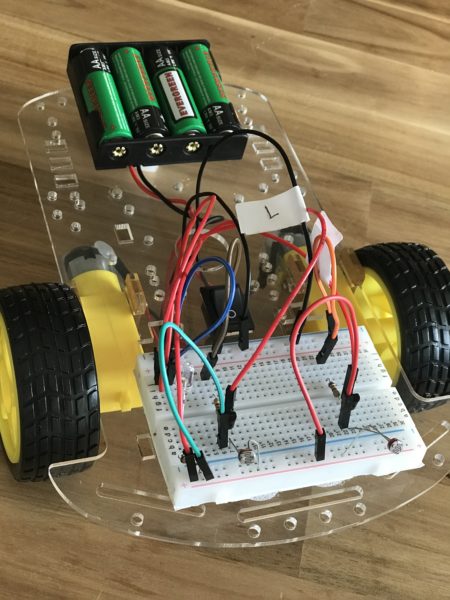
He was able to finally get both motors attached and labeled either right or left. The labeling is important for the turning of the wheels that are still to be added. 

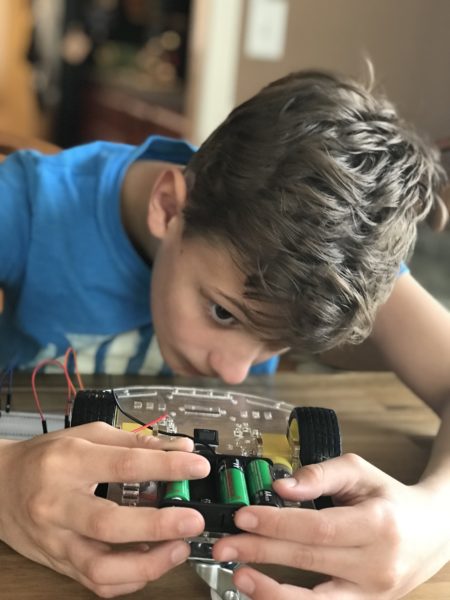
The power switch and battery pack were the next to be added. We used some velcro dots (provided) to attach the battery pack to the platform – super quick and easy. 

At this point, Q the Robot was beginning to take shape nicely. While Q waited patiently, Kaleb completed a little more wiring. 

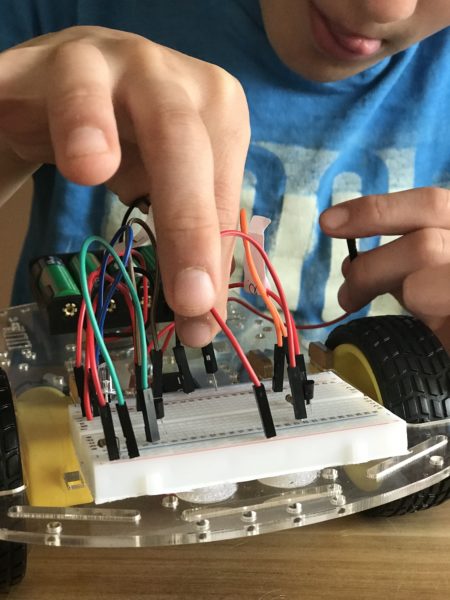
And finally the breadboard was mounted to robot body… 

motors were wired correctly (in complete concentration as you can see)…

And Q the Robot was finished! 

The best part though, after all this hard work, was seeing Q in action and having Kaleb explain some of it. Click to watch the video above (you can also visit and watch on YouTube). 


What Mom’s Need to Know…

  • Everything’s included – parts, wires, batteries are included in all every kit
  • No experience needed – our online lessons to mentor, guide, and teach your kid (seriously, this is a lovely thing)
  • Safety first – no soldering required, low voltage projects (the mom in me rejoices)

Meanwhile, kids are learning solid concepts and being challenged by building projects using REAL components. They may make mistakes, but in doing so, they learn to review and discover what they can do to make it better and work correctly. 

Perfect for ages 10+

Time Required: 1-2.5 hours

Parental involvement: varies based on child

Start Learning With EEME

There are 3 ways to learn with EEME – FREE online lessons, their robotics kit series, and their electronics kit series.

  1. For free online lessons – families create a free account with EEME and use their web browser to interactively build and learn about electronics circuits.

2. Robotics series – The first kit of the series, Q the Robot, is a project where your child builds a 3-wheeled light-following autonomous robot. The online lessons associated with Q teach how robotics circuitry works.

You can purchase Q here.

3. Electronics series – electronics kits are purchased as electronics kit monthly subscriptions. A new bite-sized kit ships every month complete with all the electronic components needed to build a new project.

Each month’s project builds on the previous month’s knowledge and interactive quizzes, questions reinforce kids’ understanding of the why’s and the how’s. 

Learn more about the electronics monthly subscriptions here.


Be sure to check out the first half of our Q the Robot project, and be sure to take a look around the EEME site. If you have kids in the 7-10 range, they have a monthly subscription option where each project focuses on a different electronic concept, but otherwise – go for Q!

Past EEME Projects

We’ve worked on several other projects from EEME. If you’re interested in learning more about their monthly subscription program, be sure to check out the below posts for more information:

Learning About Circuits with Q the Robot

EEME is a blog sponsor and we received this product free for the purpose of reviewing it. All opinions expressed are my personal, honest opinions. You can read my full disclosure policy for more details. 

One of the hardest things about receiving something fun to build is having the patience to get to the finished product. 

Especially when it’s going to be something fun. Like your very own robot. 

A few years ago Zachary had the opportunity to build Q the Robot from EEME and Kaleb is such a hands-on, STEM-loving boy, we wanted him to have the same opportunity. The process of building Q isn’t just snapping a few pieces of wiring together – it’s a chance to learn about breadboards, building circuits, how motors work, and so much more! 

Q the Robot is a project kit that guides your child through the process of building a 3-wheeled robot who follows light. He is the first in a series of robotics projects from EEME – and there is no coding required to get started! Once completed, Q follows light around using two sensors, or photo resistors. When light is shined directly onto the sensors, Q turns to follow the light. 

Building our Robot

Because there is so much to learn with Q the Robot (and even more kits build on this one base project), we’re going to share a little bit about what we learned in the first half of our building – the bulk of the steps needed to get Q moving and rolling, but before the entire body is constructed: circuits, the breadboard, motors, and transistors – and how they all work together. 

One of the things I love about EEME is that they offer FREE online lessons for your kids to view. If you don’t know a thing about electronics, don’t worry. There are step-by-step videos that will walk your child (and you) through the process, and that includes explaining all the various parts and exactly what they do. 

(Ask me how I know.)

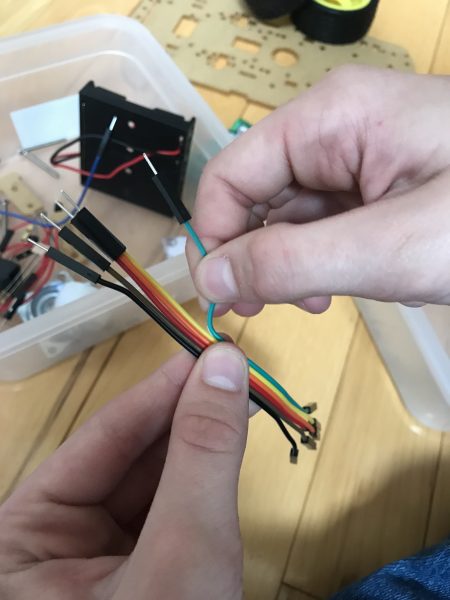
Since we have worked on Q the Robot before, one thing I will note is there have been some upgrades that make the entire process simpler for kids to work on. Rather than having to strip any wires, they now provide a few different components, such as wires with pre-installed plugs, that are easier for kids to manage (thank you!!). The overall project functions the same, but for kids who may get frustrated easily, these changes are perfect. 

Step one was sorting all of the pieces and making sure we had the correct number for everything (we did). We also gathered any additional supplies we might need (Phillips head screwdriver, a piece of paper, and scissors). 

Each of the 35 video lessons for the Q the Robot project are 5 minutes or less in viewing time, some even around the 2 minute mark. We broke up our lessons over the course of three days and spent on average about half an hour to 45 minutes working each day. 

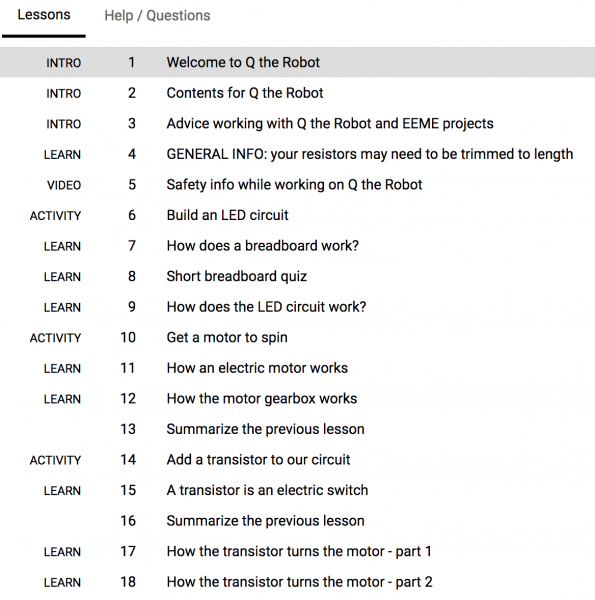
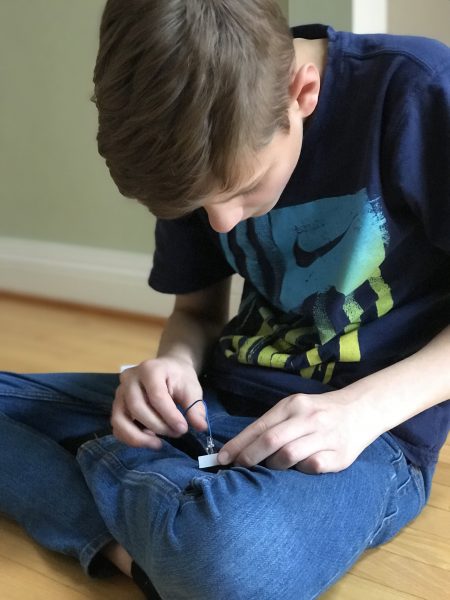
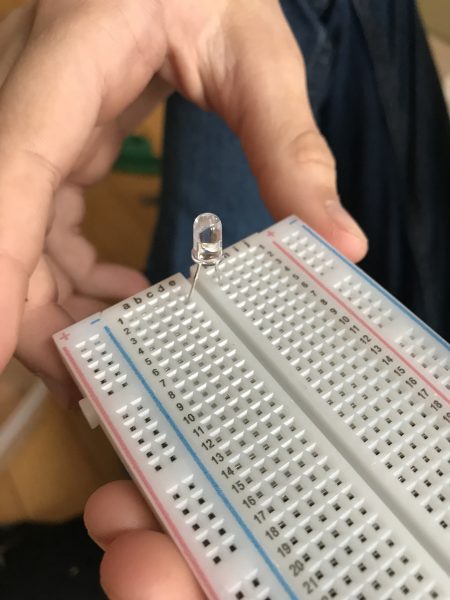
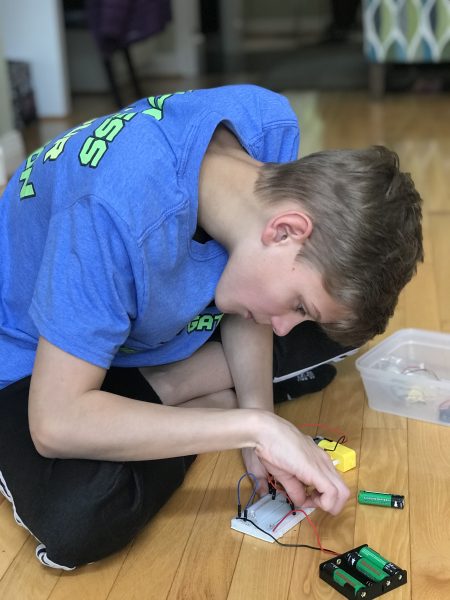
After sorting all the pieces, Kaleb took a few minutes to build an LED circuit (lesson 6) so he would know when Q was on or off. One thing that is great about this lesson is learning how to essentially mark points on a graph (find hole 4e, etc…). 

Kaleb next learned about breadboards and how the various holes are connected (lesson #7). For example, everything you see above in row 2 (2a, 2b, 2c, 2d, and 2e) are all connected. There are also four buses (two on the top and two on the bottom between the blue and red lines). 

A metal bar under each hole grouping in a row connects them together. You can connect Row 1 on the bottom half of the board to Row 1 on the top half of the board by inserting one half of a prong into each half and completing the circuit. 

One thing that I think is fabulous about this program are the intermittent ‘quizzes’ that are given to make sure kids understand the concepts they are learning. 

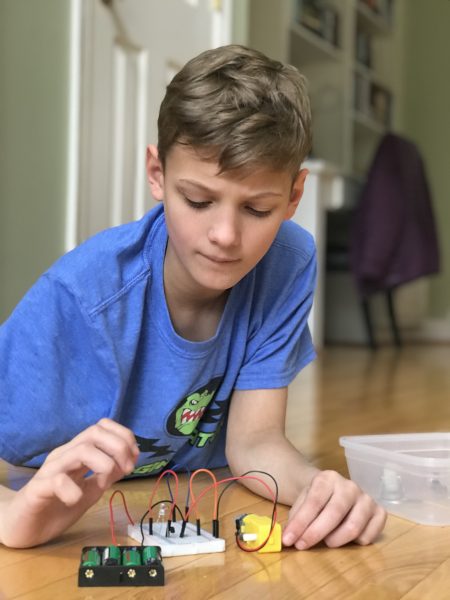
After learning the basics of the breadboard and hooking up our battery pack to make our LED light work, we moved on to motors and how they work (lessons 10 & 11). 

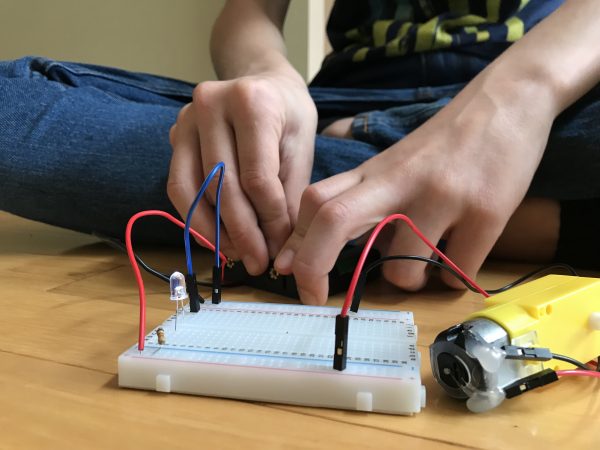
Initially our motor didn’t spin, so Kaleb was able to rewind the video, double check his wiring (which was wrong), and fix the problem so his motor would work correctly. In this lesson we also learned how to make the motor spin in opposite directions based on how the wiring was done. 

EEME Dad explains magnetism and how it affects the motors when electric current flows through – and how flipping how the motor wires changes the direction causes the magnetic field to flip as well (it’s fun to learn these things!). 

Our second day we looked more into how the motor gearbox works, and while this is something Kaleb was a little more familiar with, it was a great review in understanding both of the motors. 

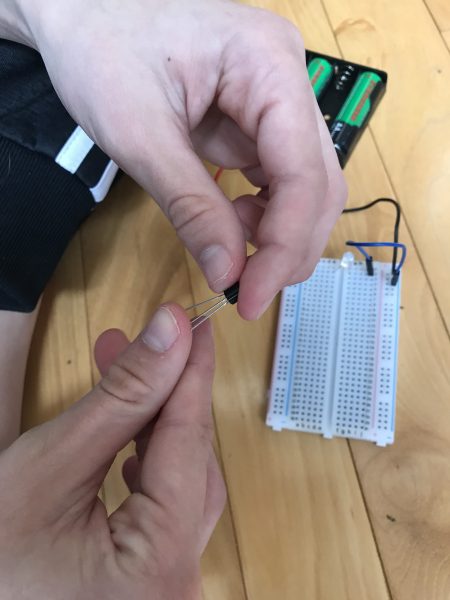
Next step: transistors (lesson #14) and adding them to the circuit. Once the prongs were splayed they were placed on the breadboard. 

He then added a few resistors to the board (learning how to make L-bends), gradually adding the motor wires as well to complete the circuit and get one of the motors turning. 

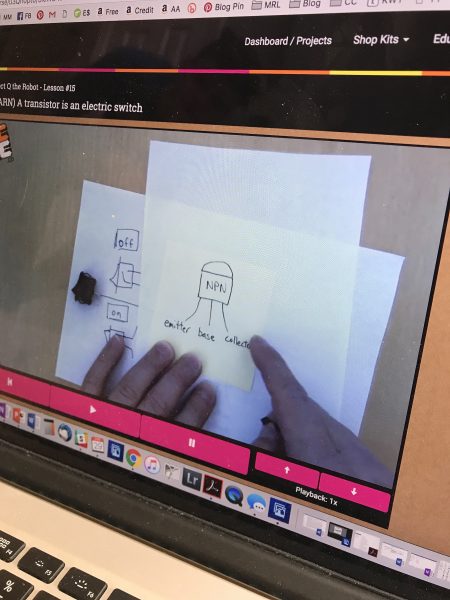
And rather than just telling the kids to use the transistor, EEME Dad explains exactly how they work (somewhat similar to a mechanical switch). He also explains how the transistor is turned “on” and “off”, allowing the current to flow through. 

Our last few lessons covered how the transistor turns the motor (lessons 17 & 18) and why the transistor gets hot. This was another great stopping point for us since Lesson 20 gave Kaleb the chance to summarize what he had been learning. 

Kid that are able to can type and submit their answers in the lesson. Since I was with Kaleb, he summarized the process to me and any part he wasn’t quite sure on, we quickly reviewed.

One of the things I appreciate about the lessons are the metaphor examples EEME Dad provides for kids – for example, comparing the resistors to a water dam, with the water levels represent voltage. He walks kids through the circuits and explains it in ways that are easy for them to understand. 

Next week I’ll be sharing the rest of our Q the Robot project, but in the meantime, I’d encourage you to take a look around the EEME site. If you have kids in the 7-10 range, they have a monthly subscription option where each project focuses on a different electronic concept, but otherwise – go for Q!

What Mom’s Need to Know…

  • Everything’s included – parts, wires, batteries are included in all every kit
  • No experience needed – our online lessons to mentor, guide, and teach your kid (seriously, this is a lovely thing)
  • Safety first – no soldering required, low voltage projects (the mom in me rejoices)

Meanwhile, kids are learning solid concepts and being challenged by building projects using REAL components. They may make mistakes, but in doing so, they learn to review and discover what they can do to make it better and work correctly. 

Perfect for ages 10+

Time Required: 1-2.5 hours

Parental involvement: varies based on child

Start Learning With EEME

There are 3 ways to learn with EEME – FREE online lessons, their robotics kit series, and their electronics kit series.

  1. For free online lessons – families create a free account with EEME and use their web browser to interactively build and learn about electronics circuits.

2. Robotics series – The first kit of the series, Q the Robot, is a project where your child builds a 3-wheeled light-following autonomous robot. The online lessons associated with Q teach how robotics circuitry works.

You can purchase Q here.

3. Electronics series – electronics kits are purchased as electronics kit monthly subscriptions. A new bite-sized kit ships every month complete with all the electronic components needed to build a new project.

Each month’s project builds on the previous month’s knowledge and interactive quizzes, questions reinforce kids’ understanding of the why’s and the how’s. 

Learn more about the electronics monthly subscriptions here.

Past EEME Projects

We’ve worked on several other projects from EEME. If you’re interested in learning more about their monthly subscription program, be sure to check out the below posts for more information: