Marie from All About Spelling sent me a link to this video the other day that tells the story behind the start of the program. If I wasn’t already using the program…well, I’d buy it all over again after watching this video!

Homeschool blog featuring free homeschool printables, information on how to homeschool, a yearly homeschool planner, homeschool curriculum, and more!
Marie from All About Spelling sent me a link to this video the other day that tells the story behind the start of the program. If I wasn’t already using the program…well, I’d buy it all over again after watching this video!
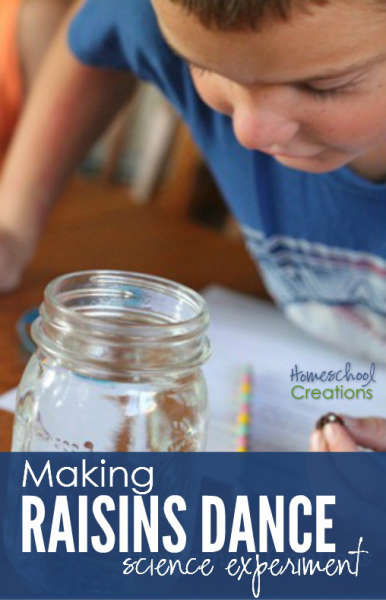
This experiment almost ended up being a total flop. I thought we had all the needed materials, but didn’t take into account the fact that the soda had been shaken by a certain 5 year old and therefore was missing a key part needed for the experiment.
Carbonation.
Fortunately, I have some children that have been paying attention during these experiment times and came up with an alternative idea that WORKED. Hallelujah…something is sinking in!
Question of the Week…What will happen to raisins dropped into a glass of clear soda?
Items we used for this experiment:
~ two clear glasses
~ clear soda {Sprite, etc…}
~ raisins
~ water
OR if you have a 5 year old who can’t keep his hands to himself….
~ two clear glasses
~ baking soda
~ vinegar
~ water
~ raisins
Predictions and Experiment…
Each of the kids made a prediction about what they thought would happen when the raisin was dropped into a glass of soda ~ would it melt away to nothing, sink to the bottom, move up and down, or float and stay at the top? We marked our answers on our record sheets and started experimenting.
First we tried putting some raisins in a glass of plain water. They sank to the bottom of the glass and sat there.
We poured the soda into the glass and then dropped some raisins in.
Nothing.
Our soda was highly non-carbonated and offered little support. Before mutiny began we talked about WHY the experiment didn’t work and what we could do to change the results. The kids all suggested using baking soda and vinegar together, so we put some water in another glass, added some baking soda, poured some white vinegar into the glass and added our raisins.
And the raisins danced!!
The Nutshell Reason…
Raisins will sink because they are more dense than water. The soda has carbonation {carbon dioxide} and forms bubbles of the gas. Some of the bubbles attach themselves to the raisins and float to the top of the water/soda. When they pop, the raisin will fall to the bottom of the jar.
After the Experiment…
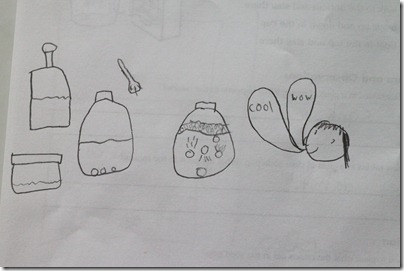
When we were finished, each of the kids drew a picture of the experiment. In case you can’t read it, McKenna’s little girl watching the experiment is saying ‘Cool’ and ‘Wow’. {grins}
Note to self…do not turn your back on your 5 year old for a split second when the container of baking soda is left on the table. Or your house and your child may look like this:
 Resource: How to Do Science Experiments with Children is available from Amazon and you can also check it out {and do some of the experiments} using Google Docs! The experiments use easy-to-find objects and also include record sheets for kids to fill out with their predictions and experiment results. Each experiment also includes teaching tips and explanations…which are rather handy! :) Don’t forget to check out some other great science ideas at Science Sunday hosted by Ticia at Adventures in Mommydom.
This week we talked about molecules…and cohesion…and surface tension. Water, soap, and newspaper were involved. Did I mention water and a squeezable bottle of dish soap?
And Mommy only wanted to bang her head on the table once.
The question to find the answer to: What will happen when two ‘men’ made out of newspaper are put into water ~ one in soapy water and one in plain water.
Items we used for the experiment:
The kids made predictions about what would happen to the little man dropped into the soapy water ~ would he sink? sink faster than the man in plain water? sink slower? same speed? All the kids thought he would sink faster ~ and they were right!
We put water on both plates and added dish soap to one of the plates. We gently put the newspaper guys on each plate and watched to see which guy decided to sink first.
After the experiment was finished, each of the kids answered several questions about what had happened and the why behind it and then drew a picture illustrating what the results were. This has really been fun to see their interpretation of the experiment.
The Nutshell Reason…
The dish soap reduces the surface tension of the water. The water molecules, instead of sticking together, attach themselves to the other material in the water {dish soap}. When the newspaper is put on to the water, the water immediately makes it wet and it sinks. The paper put in the plain water will take longer to get wet.
 Resource: How to Do Science Experiments with Children is available from Amazon and you can also check it out {and do some of the experiments} using Google Docs! The experiments use easy-to-find objects and also include record sheets for kids to fill out with their predictions and experiment results. Each experiment also includes teaching tips and explanations…which are rather handy! :)
Don’t forget to check out some other great science ideas at Science Sunday hosted by Ticia at Adventures in Mommydom.
This week our experiment together was all about chemical reactions. We have plenty of dirty money around our house {pennies that is}, so we decided to give them a bath in a few different solutions and see what would happen.
If you’d like to try this experiment at home, you’ll only need a few simple things to try it yourself:
Before starting our experiment, the kids made a prediction about what would happen when pennies were washed with a mixture of vinegar and salt. Would they sizzle, turn black, bounce up and down, or become shiny? Predictions varied with our three ~ black, bouncing and shiny {only McKenna guessed correctly}.
We also tried putting just salt on one penny and just vinegar on another to see what would happen. The salt just rubbed off and the vinegar started brightening the penny, but didn’t do a very good job.
The kids measured and mixed 6 Tbsp. of white vinegar with 2 Tbsp. of salt. They took turns stirring and stirring, meanwhile peeking to see what was happening inside the swirling mix.
Each of the kids drew a picture of what happened during the experiment ~ I LOVE seeing their interpretations of what happened! The result? Here are the before and after pictures of Laurianna’s two pennies.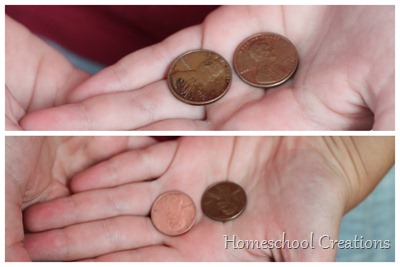
The Nutshell Reason…
Pennies become dull looking because the oxygen atoms in the air combine with the copper atoms on the pennies. When we mixed the salt with the vinegar, a chemical reaction took place. Together the two different items formed a new chemical called hydrochloric acid. When hydrochloric acid meets oxygen atoms on the surface of the pennies, it makes them shiny and looking new.
 Resource: How to Do Science Experiments with Children is available from Amazon and you can also check it out {and do some of the experiments} using Google Docs! The experiments use easy-to-find objects and also include record sheets for kids to fill out with their predictions and experiment results. Each experiment also includes teaching tips and explanations…which are rather handy! :)
Don’t forget to check out some other great science ideas at Science Sunday hosted by Ticia at Adventures in Mommydom.
In a few weeks I’ll be sharing our full curriculum line-up for the 2010-2011 school year. I had mentioned a little bit ago that we were already switching over our homeschool math curriculum for both of the girls and they will be continuing with the new program through the summer and then next year.
What did we switch to? Teaching Textbooks.
Are we liking it? Absolutely yes…but this is going to be a lengthy post. :)
We’ve used Abeka since we started homeschooling {and for now Zachary will continue to use it} but during the second half of our school year Laurianna’s frustration was mounting with math ~ and there were many days that resulted in tears for her. In doing the {numerous} reviews for math products this last year, we found one thing that seemed to help her and make it easier ~ the computer.
If I put a worksheet in front of her with 20 problems, she would start, redo, recheck and take f.o.r.e.v.e.r. to complete even five problems. Give her 20 similar problems on the computer and she would answer them in very little time, many times figuring the answer in her head ~ and correctly. Math problems that would have taken her five minutes apiece if done using the worksheet.
The difference? Generally with the computer she is getting instant feedback and won’t sit there second-guessing her answers. If she gets one wrong on the computer, she just moves on without a fuss.
We tried several sample lessons of Teaching Textbooks online, took a few placement test and decided to order Math level 4 for her, even though she is closer to the level 5. Abeka covered different concepts, but truthfully the endless worksheets were killing us.
Our goal was to start her on Math level 4 at the end of the year and have her work on a few lessons each week so she would gain confidence in herself and her math skills {because she is smart, she just doesn’t think she is no matter how much encouragement she receives from us}. Essentially, she is reviewing concepts right now, but we’ll move her into level 5 somewhere in the middle of our school year.
Coughing up roughly $100 for the program was a little difficult ~ but we are loving it enough that we ordered {and are waiting for} the Math 3 Kit for McKenna to use. We also only ordered the cd-roms and not the workbooks to go along with the cds at this point, since they can do any problems on scratch paper at this point.
With Teaching Textbooks, basically you watch the lesson, do the problems and then review any of the problems that you missed or need help on. Each lesson has a guided lecture, Q/A time and it self-corrects. When Laurianna is done with her lesson, I’m able to print off her scores to put into our record book, along with any quiz scores {love this!!}. The parent section of the software allows me to have her repeat a lesson if needed, change answers and also shows me specifically where/if she needs help.
Even though the program is a bit more pricey, it can be used again from year-to-year with the rest of our children {making it $25/child for us}, includes a passcode for 2 computers {you can call if more are needed} and it can also be resold {hooray!!}.
The biggest question is ~ does Laurianna like it and is it actually working for her? She actually asks to do her math lessons now, so that should give you some indication of how it is going at our house.
That and McKenna is upset that her program hasn’t arrived yet.
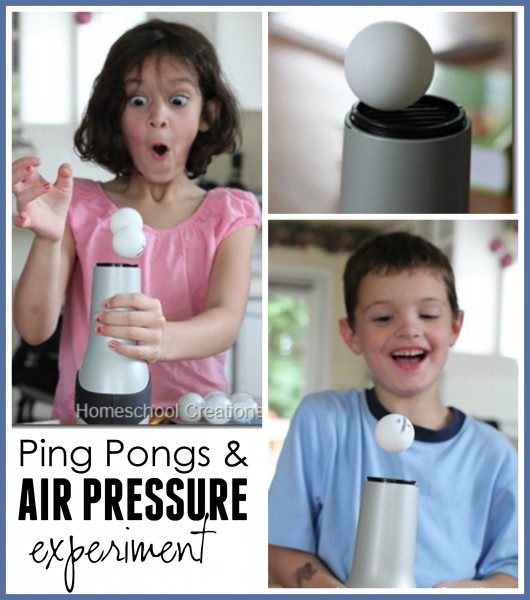
We had much fun with a quick and easy experiment this week that helped us all learn a little bit about high and low air pressure. I found a lovely book of science experiments {see below} hidden in a stash of my teaching books while I was cleaning and sorting books for next year.
If you want to try the experiment yourself, you’ll only need a few things:
~ a blow dryer
~ ping pong balls
~ electricity
Before we started our experiment we made a prediction about what would happen to the ping pong ball resting on the nozzle of the blow dryer. when we turned the blow dryer on. Would it blow away? Stay in the column of air above the dryer? Be sucked into the hair dryer? Melt? The kids were mixed in their predictions and Zachary ended up being the one to guess predict correctly.
Each of the kids took turns trying it out, moving the hair dryer from side to side and up and down so that the ball traveled along with the air stream. McKenna wondered if two balls would be able to stay in the air stream ~ and they did for all of 3 seconds {but the look on her face was hilarious!}.


Zachary ~ the ball is light and air is heavy so the air was lifting the ball up
McKenna ~ the ball was light and the air force was so strong it floated
Laurianna ~ because the heat rose straight up and didn’t spread out
The Nutshell Reason…
The pressure in the column of rapidly moving air shoots upward and is lower in pressure than the air around the column. The ping pong ball is ‘pushed’ back into the center column by the higher pressure of the air particles around the column ~ air moves from areas of higher pressure to areas of lower pressure.
Resource: How to Do Science Experiments with Children is available from Amazon and you can also check it out {and do some of the experiments} using Google Docs! The experiments use easy-to-find objects and also include record sheets for kids to fill out with their predictions and experiment results. Each experiment also includes teaching tips and explanations…which are rather handy! :)
Don’t forget to check out some other great science ideas at Science Sunday hosted by Ticia at Adventures in Mommydom.
Hello! My name is Jolanthe {pronounced Yo-lawn-the}. On my site, you will find a listing of free educational printables, helpful tips and resources for families, encouragement for your homeschool journey, and a homeschool planner to help you get organized. Feel free to contact me with questions!

 The printables shared on this site are FREE of charge unless otherwise noted, and you are welcome to download them for your personal and/or classroom use only. However, free or purchased printables are NOT to be reproduced, hosted, sold, shared, or stored on any other website or electronic retrieval system (such as Scribd or Google docs). My printables are copyright protected and I appreciate your help in keeping them that way.
If you download and use some of my printables and then blog about them, please provide a link back to my blog and let me know - I'd love to see how you are using them! Please be sure to link to the blog post or web page and not directly to the file itself. Thank you!