20 Best Tips

Pockets of Air ~ Science Sunday

Science Sunday

Question of the Week…Will a crumpled up napkin placed in the bottom of a cup get wet when the cup is placed upside down in a bowl of water?

Items we used for this experiment:

~ bowl

~ water

~ plastic cup {we used one we could see through}

~ napkin

Predictions and Experiment…

Each of the kids made a prediction about what they thought would happen to the napkin when we put it into the cup, turned it over and then pushed the cup down into the water. Would it get wet, stay dry, or suck up all the water?

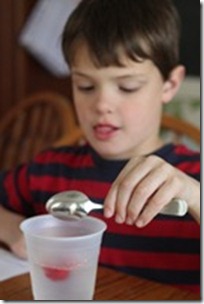
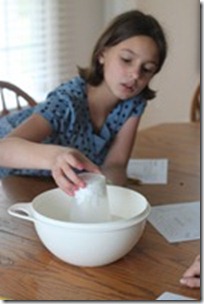
After we’d made our predictions, we crumpled up the napkin and pushed it into the cup. Laurianna turned the cup upside down and carefully pushed it straight down into the bowl of water.

 20110419-IMG_946620110419-IMG_9467

The napkin stayed dry! We tried the experiment again after we talked about the ‘why’ of the napkin staying dry {see below} and this time let the cup tip to the side when we put it in the water and the napkin got wet.

The Nutshell Reason…

Even though we can’t see it, air still takes up space. When we carefully put the cup into the the bowl of water, a pocket of air stayed kept the water from reaching the napkin. When we tipped the cup to the side and allowed the air to escape, the water pushed the air out and the napkin got wet.
How to Do Science Experiments with Children Resource: How to Do Science Experiments with Children is available from Amazon and you can also check it out {and do some of the experiments} using Google Docs! The experiments use easy-to-find objects and also include record sheets for kids to fill out with their predictions and experiment results. Each experiment also includes teaching tips and explanations…which are rather handy! :)

Don’t forget to check out some other great science ideas at Science Sunday hosted by Ticia at Adventures in Mommydom.

 Jolanthe Signature affiliate button

Mixing Jello ~ Science Sunday

Science Sunday

Super simple experiment this week, but a great way to talk about molecules and demonstrate how they make a difference in water. :)

Question of the Week…What will happen to jello/gelatin when it’s added to hot water versus cold water?

Items we used for this experiment:

~ hot water

~ cold water

~ 2 cups

~ jello

Predictions and Experiment…

Each of the kids made a prediction about what would happen to the jello when a pinch of it was added to hot water and a pinch of it was added to a cup of cold water. Would it float on the top of the water, solidify, or mix with the water?

The Experiment…

First we poured a bit of the jello pack into the cup of cold water to see what would happen to that. Fairly uneventful.

20110419-IMG_9469

Once we had recorded our answers to the cold jello trial, we poured a bit of the jello pack into the cup with hot water and watched. The jello began mixing with the water right away and dissolving.

{and of course the questions began on could we now smell the jello water, drink the jello, or eat the jello…sigh}.

The Nutshell Reason…

Water molecules in water vibrate, and hot water molecules vibrate faster than those in cold water because they have more energy. When we put the jello into the hot water, the jello dissolved more quickly because the vibration of the water molecules was greater ~ it spread out more quickly and dissolved.

How to Do Science Experiments with Children Resource: How to Do Science Experiments with Children is available from Amazon and you can also check it out {and do some of the experiments} using Google Docs! The experiments use easy-to-find objects and also include record sheets for kids to fill out with their predictions and experiment results. Each experiment also includes teaching tips and explanations…which are rather handy! :)

Don’t forget to check out some other great science ideas at Science Sunday hosted by Ticia at Adventures in Mommydom.

 Jolanthe Signature affiliate button

Studying Human Anatomy ~ Science Sunday

Science Sunday

As of this week we’re about midway through our Human Anatomy unit in our Nancy Larson Science 1 and the kids are loving it! Kaleb has even been sitting in on our lessons and cracking us up with what he remembers from our studies.

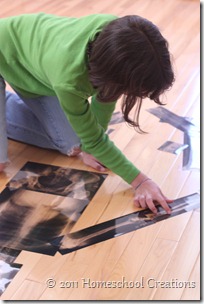
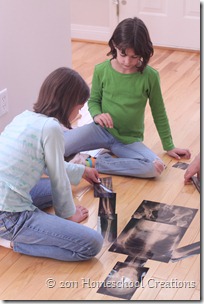
We’ve been talking about muscles, joints, bones and had a little ‘hands-on’ fun this week learning about our skeletal system and bones with some x-rays!

20110406-IMG_9029  20110406-IMG_9030

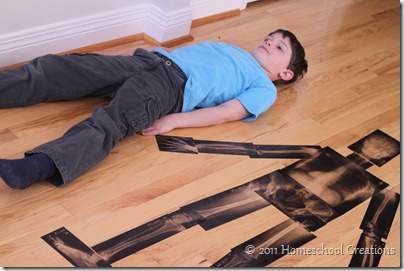
The x-rays in the kit are actual child-sized, so we had fun comparing our skeleton size to the size of one of us ~ just about the size of Zachary.

20110406-IMG_9039

The x-rays were great because we could see the various joints all over our bodies and talk about the bones that we’ve been learning about {which one is the largest bone in our body and how many bones there are in our bodies}.

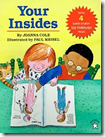
imageOne of the books that we’re using as a part of our unit is Your Insides by Joanna Cole {available used from Amazon}. It is also a part of the Nancy Larson Science 1 kit. The book offers a look at what goes on inside your body and also features several ‘see-through’ pages giving a layered look at muscles, bones, heart/lungs, brain, nerves and more.

Don’t forget to check out some other great science ideas at Science Sunday hosted by Ticia at Adventures in Mommydom.
 Jolanthe Signature affiliate button

You can read my review of Nancy Larson Science 1 here.

Inflating a Balloon Hands-Free ~ Science Sunday

Science Sunday

This experiment was so simple, it seems almost silly to post it. It seriously took me longer to round up a soda bottle to use for the experiment than it did to run the experiment. All that said, the kids absolutely loved it and we extended it a little bit by talking about the periodic table and elements.

Question of the Week…What would happen to a balloon with baking soda inside when placed on top of a soda bottle that had vinegar in it?

Items we used for this experiment:

~ soda bottle

~ one balloon

~ 2 Tbsp. baking soda

~ 8 Tbsp. vinegar

~ funnel & measuring spoon

Predictions and Experiment…

Each of the kids made a prediction about what they thought would happen ~ an explosion and mess, nothing, inflation, etc….

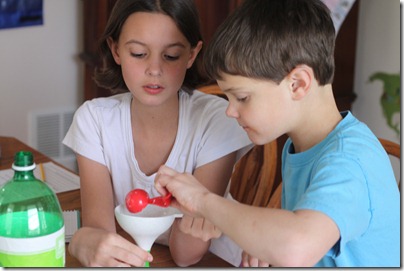
Zachary and Laurianna worked together measuring the baking soda and putting it into the balloon using a funnel.

20110322-20110322-IMG_8760

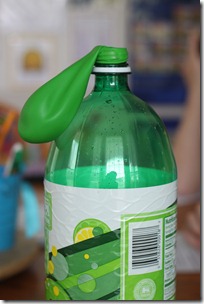
We added the vinegar into the soda bottle {after rinsing out our funnel} and then stretched the base of the balloon over the opening of the soda bottle, being careful not to drop any of the baking soda into the bottle.

20110322-20110322-IMG_8762 20110322-20110322-IMG_8763

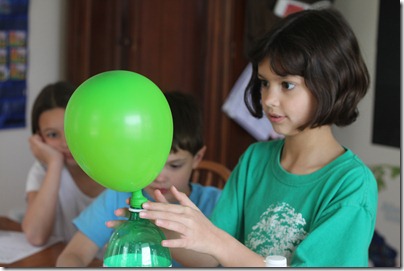
We then tipped the balloon up and let the baking soda fall into the bottle and the balloon quickly began to inflate.

20110322-20110322-IMG_8771

Fun, no?

The Nutshell Reason…

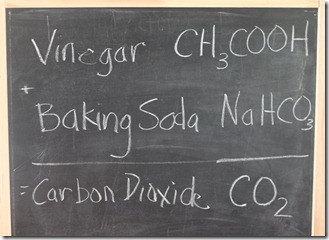
If you want the really technical reason, here is why…

20110322-20110322-IMG_8776

The reason really is simple though. The vinegar and the baking soda mix, forming a chemical reaction and creating a gas {carbon dioxide} that fills the balloon.


How to Do Science Experiments with Children Resource: How to Do Science Experiments with Children is available from Amazon and you can also check it out {and do some of the experiments} using Google Docs! The experiments use easy-to-find objects and also include record sheets for kids to fill out with their predictions and experiment results. Each experiment also includes teaching tips and explanations…which are rather handy! :)

Don’t forget to check out some other great science ideas at Science Sunday hosted by Ticia at Adventures in Mommydom.
 Jolanthe Signature affiliate button

Science Sunday ~ Baby Chicks!

Science Sunday

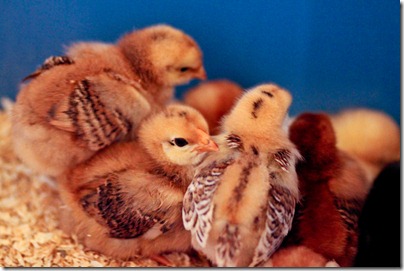
Technically, this is an experiment of sorts. Yesterday we picked up eight baby chicks. Considering we’ve never been able to have chickens before, we are in unchartered territory around our house.

20110319-20110319-IMG_8728

We are in the process of building a coop for the little ones, but since they still have to stay inside for a bit longer, we’re figuring out exactly what we want to do. In the meantime, our chicks are keeping warm under their warming lamp, plumping up on their chick feed and amusing our kids to no end.

20110319-20110319-IMG_8708

Originally we had only planned on getting six chicks, but somehow ended up with eight…just in case one turned out to be a rooster or in case one of our chicks met an untimely demise. The plan was to get all Rhode Island Reds or Red S*x Links {umm, yeah, there’s a reason I’m putting that asterisk in there!}, but the breeder we bought them from talked us into a mixture for fun ~ 2 of both of the above breeds and then a mix of 3 others, but all brown egg layers. And because I know SO little about different breeds, that’s about all I can really share ~ all I heard was ‘blah, blah, blah’ when she got into all the technical stuff.

SO, I suppose I have some questions for YOU all today. What are your best tips for raising chicks? We’re in the midst of mapping our the plans for the coop and chicken tractor, but if you have any tips or websites that you know are chocked full of great advice, we’d love to hear about them! :) We have months to go before we’ll be enjoying fresh eggs, but in the meantime need to figure out how to keep the hens safe from nearby predators {fox, owls, bobcat and even bears}. Leave a comment and share!!

Stay tuned too ~ next Sunday I’ll start posting our experiments again! We’ve been missing those fun little breaks, but we’re still working on our Nancy Larson Science 1 and just finished up our Zoology unit. Don’t forget to check out some other great science ideas at Science Sunday hosted by Ticia at Adventures in Mommydom.

 Jolanthe Signature affiliate button

The Great Backyard Bird Count

image

Next week is promising to be a bit crazy in our household since our official move date has been set. Most likely school as we generally know it will be put aside while we pack and unpack, but in the midst of it, I am truly hoping that our kids will be able to participate in The Great Backyard Bird Count from February 18th-21st.

At our current house we do see several different birds each day, but our new house promises to have a MUCH larger variety of birds!! Today I’ll be busy printing off a tally sheet and getting our bird feeders ready to move over to the new house.

The website for The Great Backyard Bird Count has some helpful articles and tips on their site too, even if you are unable to participate this time around ~ tips on choosing bird food, bird feeder placement, selecting the right bird feeder, identifying tricky birds, and myths about bird feeding.

Learn more on how you can participate here and print off some great helps for educators including regional bird checklist and info on a photo contest too!

Will you be participating in The Great Backyard Bird Count or have you in the past?

Jolanthe Signature affiliate button