20 Best Tips

Transferring Momentum {Science Sunday}

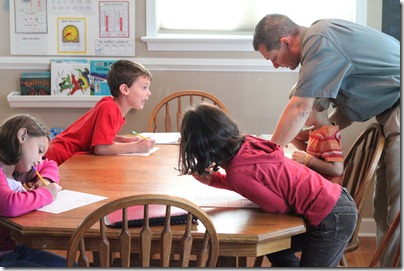
Rick had a morning off and since he is technically the resident scientist {and since the experiment lesson plans are already written out ~ grins}, the kids had fun with Daddy helping with their science experiment.

IMG_8255   

Question of the Week…What will happen to a dime that is placed at the end of a wooden rule when a quarter slides against the opposite end of the ruler?

Items we used for this experiment:

~ a ruler

~ a quarter

~ a dime

Predictions and Experiment…

IMG_8256

Each of the kids made a prediction about what would happen ~ it wouldn’t move, it would slide a little, slide a lot. They marked their answers on their prediction sheet and then we started the experiment.

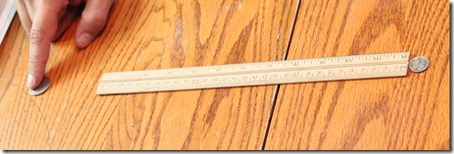
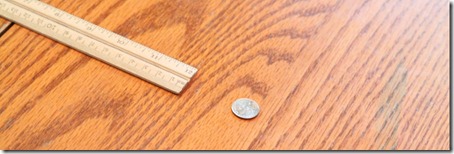
Daddy slid the quarter so it would hit one end of the ruler…

IMG_8258

and the dime bounced away from the other end of the ruler.

IMG_8259

The Nutshell Reason…

Momentum is transferred from the quarter to the dime through the ruler. We explained it further by giving an example of what would happen if a tractor trailer truck were to hit a small car and vice versa.

After the Experiment…

The kids had fun trying the experiment over and over…until someone walked off with the coins. :)
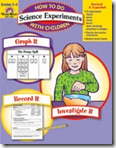
How to Do Science Experiments with Children Resource for this experiment: How to Do Science Experiments with Children is available from Amazon and you can also check it out {and do some of the experiments} using Google Docs! The experiments use easy-to-find objects and also include record sheets for kids to fill out with their predictions and experiment results. Each experiment also includes teaching tips and explanations…which are rather handy! :) Don’t forget to check out some other great science ideas at Science Sunday hosted by Ticia at Adventures in Mommydom.

 Jolanthe Signature affiliate button

Density of Water Experiment {Science Sunday}

Not all science experiments go according to plan, which means although it was a bust, we still had the opportunity to talk about what should have happened and how the experiment went wrong. Or better yet, if at first you don’t succeed, Mommy will try, try again until it works the way it was supposed to {‘cause she’s a little crazy like that}.

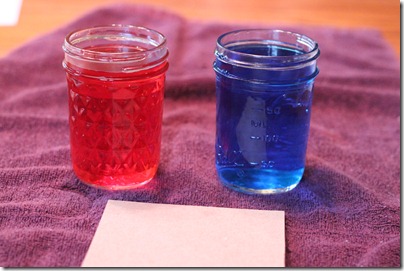
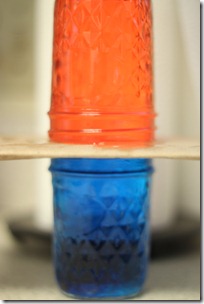
Question of the Week…what would happen when a bottle of warm water {red} was place upside down over a bottle of cold water {blue}?

IMG_8204

Items we used for this experiment:

~ two glass jars

~ hot and cold water

~ blue and red food coloring

~ piece of cardboard

Predictions and Experiment…

Each of the kids made a prediction about what would happen to the waters when the piece of cardboard was removed from between the two jars…would the colors mix, stay the same?

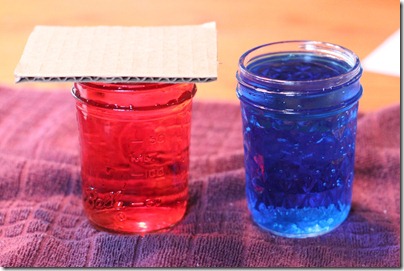
We put the cardboard on top of the warm water, inverted it and then pulled it out from between the jars.

IMG_8207

This is what happened {and what wasn’t supposed to happen}. The colors mixed.

IMG_8208

Obviously the water spilled too, but there was just too much of a ‘drop’ when the cardboard was removed and it just plopped into the container below.

The Nutshell Reason…

The warm water is {supposed to be} less dense than the cold water and liquids of different density will {usually} not mix. The warm water SHOULD have stayed above the cold water ~ floating above the cold water.

After the Experiment…

We recorded our results on our experiment sheets, telling what happened and also what should have happened. I couldn’t leave well enough alone and decided to take matters into my own hands and try to get the experiment right {I know…my brain drives me nuts like that!}.

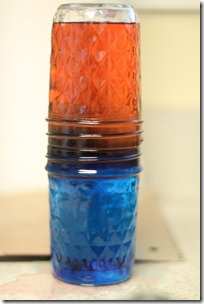
In an attempt to get the experiment right, I filled each of the jars up to the very top. I also used a thinner piece of cardboard because the ‘drop’ of the water when the cardboard needed to be pulled out was too much.

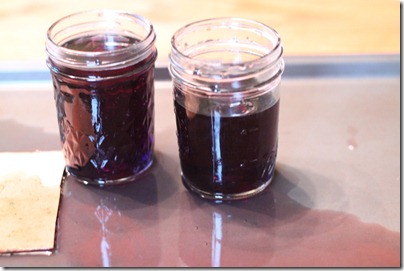
The result?  SUCCESS!!!!

IMG_8282 IMG_8283

How to Do Science Experiments with Children Resource for this experiment: How to Do Science Experiments with Children is available from Amazon and you can also check it out {and do some of the experiments} using Google Docs! The experiments use easy-to-find objects and also include record sheets for kids to fill out with their predictions and experiment results. Each experiment also includes teaching tips and explanations…which are rather handy! :) Don’t forget to check out some other great science ideas at Science Sunday hosted by Ticia at Adventures in Mommydom.

 Jolanthe Signature affiliate button

Nancy Larson Homeschool Science Review

Nancy Larson Homeschool Science

Until this year, science was one of my LEAST favorite areas to teach the kids. It was the one thing that I went to our homeschool convention hoping to find. When I passed the booth for Nancy Larson Homeschool Science, I was intrigued. After stopping by, I ended up spending {literally} hours talking with the ladies there. It was the BEST stop of my convention trip.

We received this product at no cost in exchange for our honest opinion. All thoughts expressed are solely mine.

We’ve been using Nancy Larson Homeschool Science 1 for the last 6 weeks and science time has become one of the most enjoyable and fun subjects we work on together as a family. The kids don’t want to stop and because of how the lessons are put together, neither do I!

A Complete Homeschool Science Curriculum

Nancy Larson Homeschool Science is a complete homeschool science program that currently has three levels available with an emphasis on Life Science for Science 1, Physical Science in Science 2, and Earth and Space in Science 3. We are using Science 1 with our oldest three children, and it focuses on the following areas:

  • Developmental Biology: life stages of human beings
  • Botany: observing trees
  • Earth and Space: exploring sunlight, water and soil
  • Zoology: investigating animals and their habitats
  • Anatomy: discovering what is inside our bodies
  • Entomology: examining the characteristics and life cycle of insects

Nancy Larson Science 1


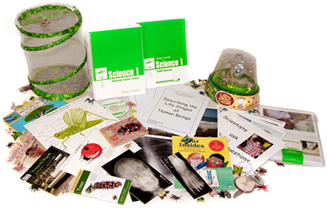
The Science 1 complete program includes a Teacher’s Manual, Student Materials, Resource Materials, and a Tool Kit ~ almost everything that you need to begin using it immediately {minus the pens, pencils and some basic household items} with one child. Additional student units can be ordered if you want to use the same level with more than one child.

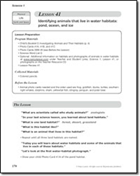
Nancy Larson teacher's manualThe Teacher’s Manual is AMAZING!! The lesson plans are scripted, giving examples of what the teacher and student dialogue should be and lessons are completely laid out for the teacher. Supply lists are included at the start of each lesson, so you can quickly grab what you need and have it ready for the lesson {a big help!}. You can view a sample of a lesson here.

Each level of the Nancy Larson Science program includes the following learning tools in the Student Material packet:

Nancy Larson Studen Materials

  • Student Booklets ~ help children highlight important information from the lessons, draw pictures that correspond to the lessons, and record information that they are learning during their lessons
  • Lesson Reviews ~ questions to help the children review information from the current and prior lessons
  • Study Guides ~ a review of the information in the student booklets
  • Assessments ~ a little something to help you assess what your child is learning from the lessons.

Laurianna science

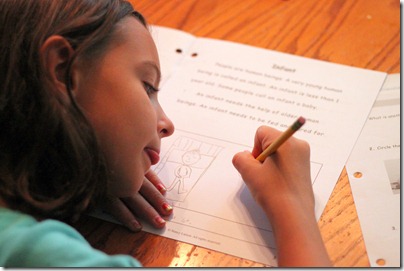
Laurianna illustrating a lesson in her Student Booklet

Each Science Level also includes a Teacher Resource CD that provides extra information relevant to that level: complete supply lists, photographs to go along with lessons, word lists, and more.

The Tool Kit for the Science 1 program includes all of the hand-on manipulatives and books that you will use throughout the year: pine cones, tree cookie, hand lens, x-ray set, Live Butterfly Garden®, Butterfly Larvae Coupon, Ladybug Land™, Ladybug Larvae Coupon, insect learning cards, plastic insects and spiders set, and the following books: What Do Scientists Do?, Peterson First Guide to Trees, Trees to Paper, Familiar Insects and Spiders, Your Insides, and The Seasons of Arnold’s Apple Tree.

You can view more information on any of the homeschool science programs on Nancy Larson’s website.

My Thoughts

I don’t know that I can say that I have one favorite thing about the program, because it all fits together as a wonderful program. Having everything I could possibly need included in the Complete Program is definitely wonderful. I didn’t have to run around town to find random items or hunt down random books to use with the program. I also love that I don’t need to plan any lessons because it is all done for me!

I mentioned that we’ve been using it with our three oldest children {ages 5, 7, and 9}. Nancy Larson Homeschool Science has literally turned our science learning time around. We have our science time twice a week and when we have finished one lesson, the kids all beg me to keep going. This is a huge difference from year’s prior when the kids did not want to work on what we were supposed to…and neither did I. We all look forward to science time now and I look forward to using future levels of Nancy Larson Homeschool Science.

While talking to the ladies from Nancy Larson science at the homeschool convention, I was amazed to hear that seven years of research, planning, and development go into EACH level of the curriculum. It is field tested for several years of that time, so that when it arrives on your doorstep you are ready to go. I can’t say enough how thoroughly impressed I am with the curriculum as a whole ~ or how highly I recommend it to other homeschool families. Find Out More You can view and purchase all of the products available from Nancy Larson Homeschool Science on her website.

A few other things to note:

  • Science 1 is designed for ages 5-8; Science 2 for ages 7-9; Science 3 for ages 8-11
  • Science K Homeschool Kit is scheduled to be released the summer of 2011. Science 4 Homeschool Kit should release the summer of 2012. Science 5 Homeschool Kit is scheduled to be released summer of 2013.
  • Check out the Blooming Scientists blog ~ the homeschooling parent community from Nancy Larson.

Please feel free to ask any questions in the comments or contact Madon Dailey directly, a representative of Nancy Larson Homeschool, if you have any specific questions. She is wonderful and would be happy to help you out!


Jolanthe Signature

Great Science Resources ~ Homeschool Village

Homeschool Village

The topic this week at the Homeschool Village is science. Truthfully, this is an area that until recently I wouldn’t have recommended much of anything ~ because we were inconsistent and hadn’t found anything that worked and was enjoyed by all of us.

Until this year that is.

What made the difference? I’ll give you a little teaser and tell you that Nancy Larson Homeschool Science has been pivotal in changing our minds. Both the kids and I are excited about the Science 1 program that we’ve been using this year…and I’ll be sharing more about it next Tuesday with you all!

In addition to our new science program, we’ve started doing simple {but How to Do Science Experiments with Childrenfun} experiments using the book How to Do Science Experiments with Children. The experiments use easy-to-find objects and also include record sheets for kids to fill out with their predictions and experiment results. Each experiment also includes teaching tips and explanations. Here are a few of the fun experiments we’ve done using this book:

Don’t forget to visit Homeschool Village and see what other moms are sharing about this topic!

Jolanthe Signature affiliate button

Making Water Spill {Water Cohesion} ~ Science Sunday

Science Sunday

This week we did a pretty simple experiment, but one that ALL of the kids enjoyed being a part of {even Kaleb}.

It involved two of their favorite things: money and water. What’s not to like about that, eh?


Question of the Week…

How many pennies would it take to make the water spill over the top of the bowl?

Items we used for this experiment:

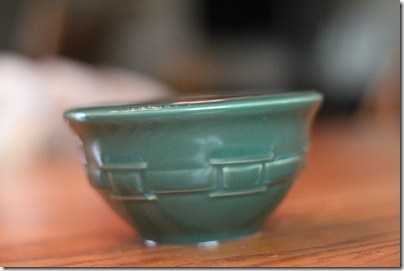
~ a bowl

~ water

~ lots of pennies

Predictions and Experiment…

Each of the kids made a prediction that underestimated what actually took place. :) They had to guess how many pennies we would be able to drop in an already full bowl of water. Each of them figured under 10…when in reality it was almost 40 pennies!

We divided out a pile of pennies and the kids each took a turn dropping a penny into the bowl of water.

water cohesion

and dropping…

water cohesion experiment

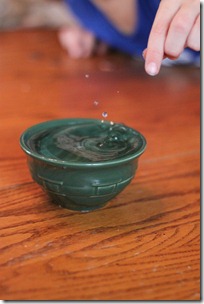
Can you see the water bulging over the top? Ours bulged even more than this before it started spilling.

water cohesion experiment 

The Nutshell Reason…

The water molecules are attracted to each other {cohesion}. Cohesion keeps liquids from spreading out {gas will spread, liquids stick together}. A dome will form on the top of the water as the water rises higher because the water molecules are pulled inward {toward the center} of the water mass.

As pennies are added the water starts to rise due to cohesion. The water will eventually spill when gravity kicks in.

After the Experiment…

While we talked about the ‘why’ behind the experiment that we did, the kids illustrated their version of the experiment on the back side of their experiment sheets. Later we answered a few questions together about the experiment.

And then fought about who got to keep the pennies…{sigh}.

How to Do Science Experiments with Children Resource: How to Do Science Experiments with Children is available from Amazon and you can also check it out {and do some of the experiments} using Google Docs! The experiments use easy-to-find objects and also include record sheets for kids to fill out with their predictions and experiment results. Each experiment also includes teaching tips and explanations…which are rather handy! :) Don’t forget to check out some other great science ideas at Science Sunday hosted by Ticia at Adventures in Mommydom.
 Jolanthe Signature affiliate button

Nature Time {Science Sunday}

No experiments this week ~ just fun in the great outdoors. Rick and I took the kids to a nearby park/river and we spent time exploring the things around us.

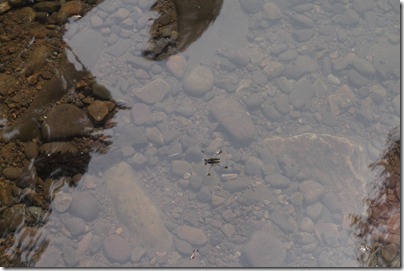
The first thing that we saw was a water bug ~ a great opportunity to talk about what we remember about our surface tension experiment.

Water bug

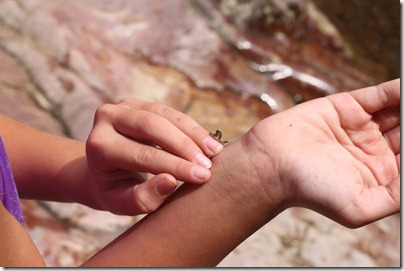
We found an inchworm crawling on Daddy’s shirt and had fun watching it crawl around on our fingers.

inchworm

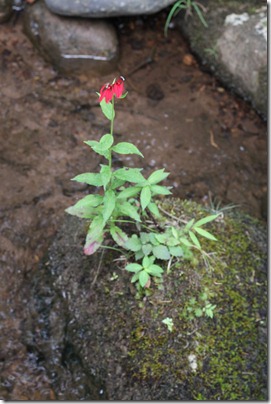
Laurianna and I saw this flower in the middle of the river…growing on a rock. A great time to talk about deep and shallow roots…

flower on rock

There were SO many different butterflies clustered in one area on the bank. We have yet to look up and see exactly what these two are.

 butterflies

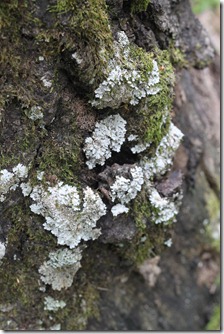
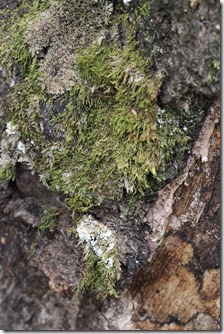
During a walk around the park we found a decaying tree stump with both moss and lichen growing on it.

 lichen  tree moss

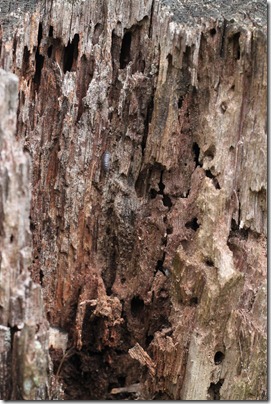
The stump was a great example of decay and we had fun peeling back parts of the stump, squeezing parts of it between our fingers to see how squishy it was {compared to typical wood} and looking at all of the bugs crawling around inside and around the stump.tree decay

It was a lazy afternoon…but so much fun and lots of learning too. :) Gotta love that! Don’t forget to check out some other great science ideas at Science Sunday hosted by Ticia at Adventures in Mommydom.

 Jolanthe Signature affiliate button